
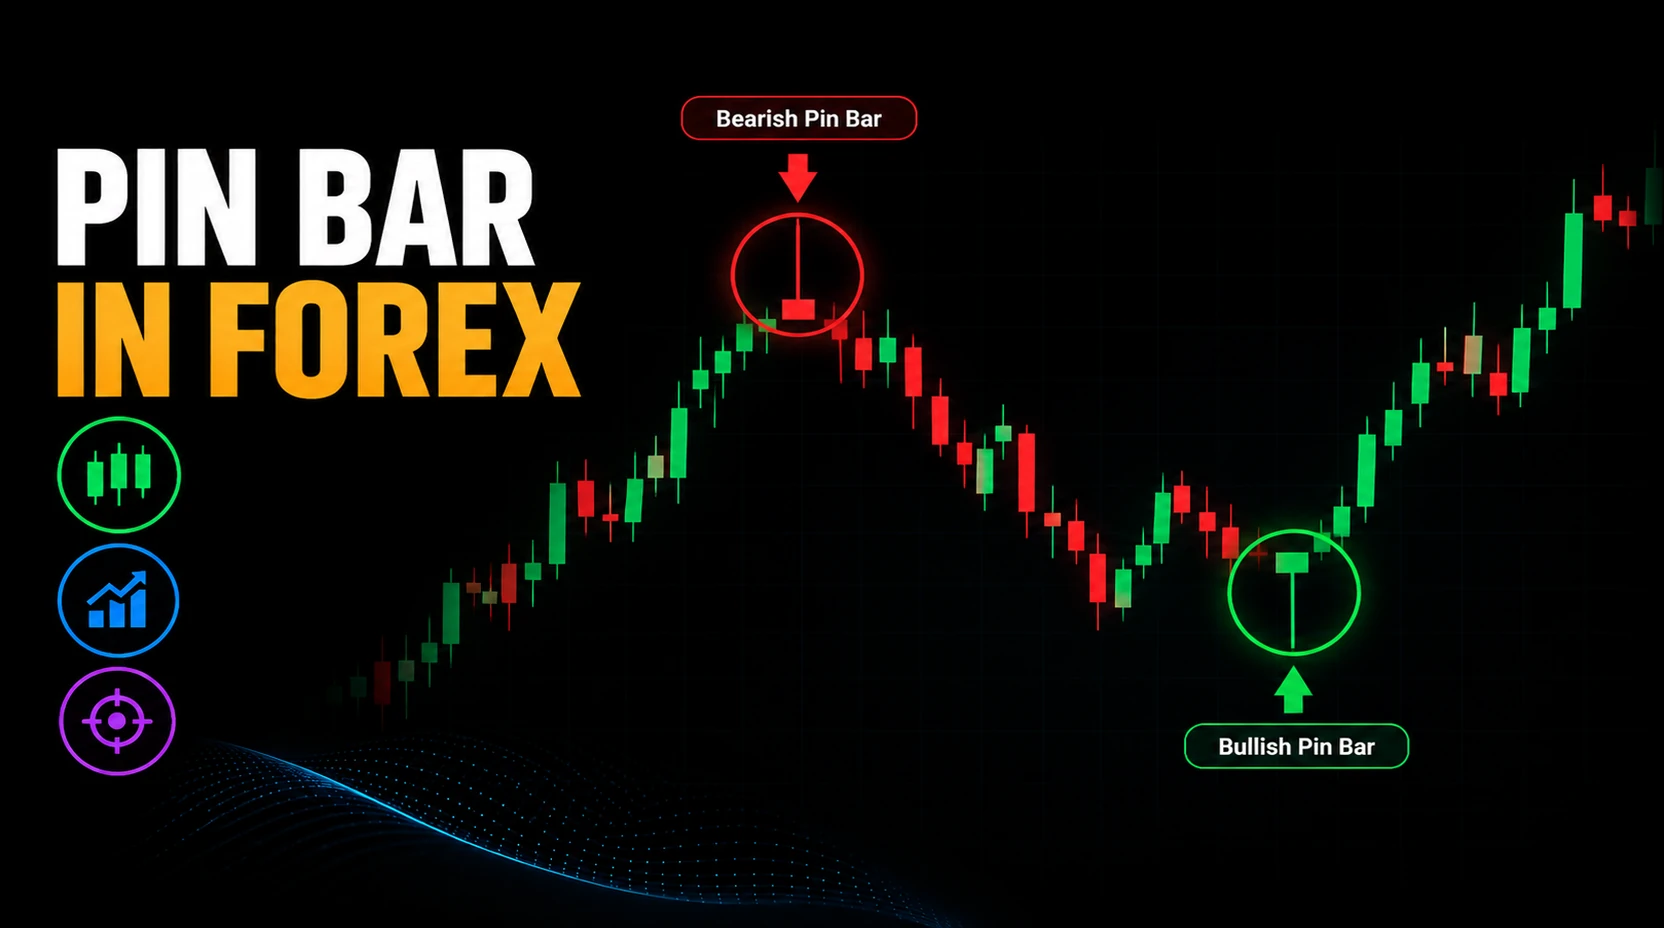
What Is a Pin Bar in Forex?
A pin bar is a completed candlestick with one dominant wick or tail, a relatively small real body, and a close near the end of the candle opposite the long wick. Price reached the wick extreme during that period but closed away from it. Traders often call this a rejection candle: rejection describes the recorded price shape, not proven order flow or a guaranteed reversal.
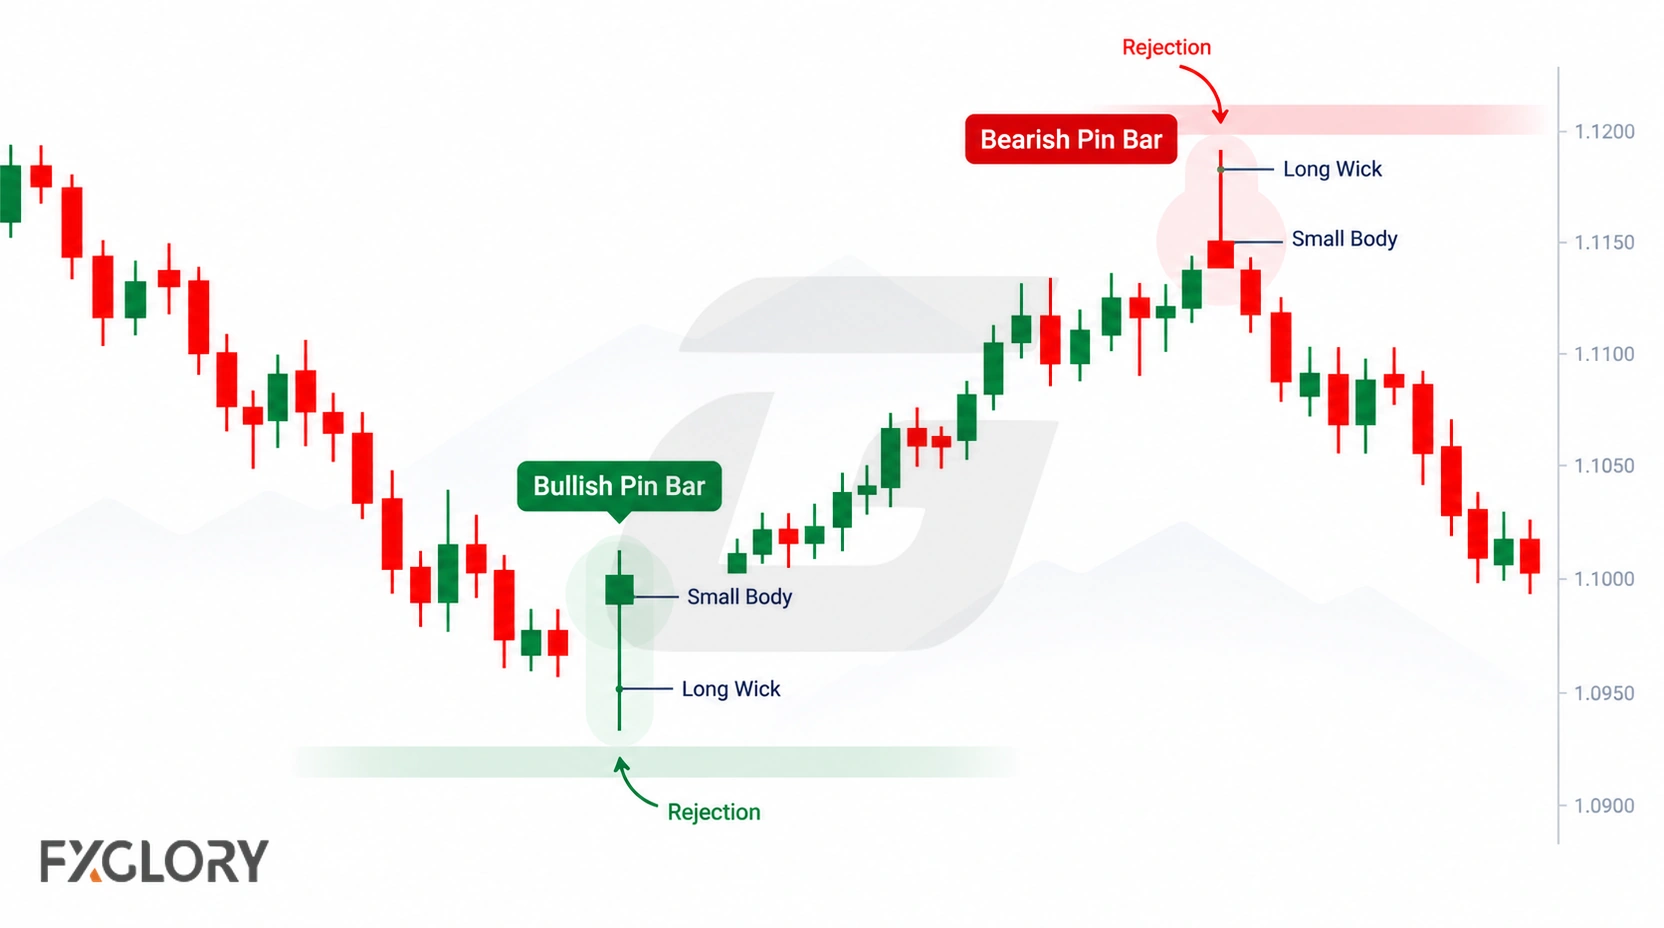
The name Pinocchio bar compares the extended wick to Pinocchio’s nose. The name adds no separate confirmation rule. A pin bar may be identifiable on its own, but its location and subsequent price action determine what, if anything, it contributes to a particular market reading.
For the underlying candle terminology, see the guide to candle bodies and wicks.
Pin Bar Candlestick Anatomy
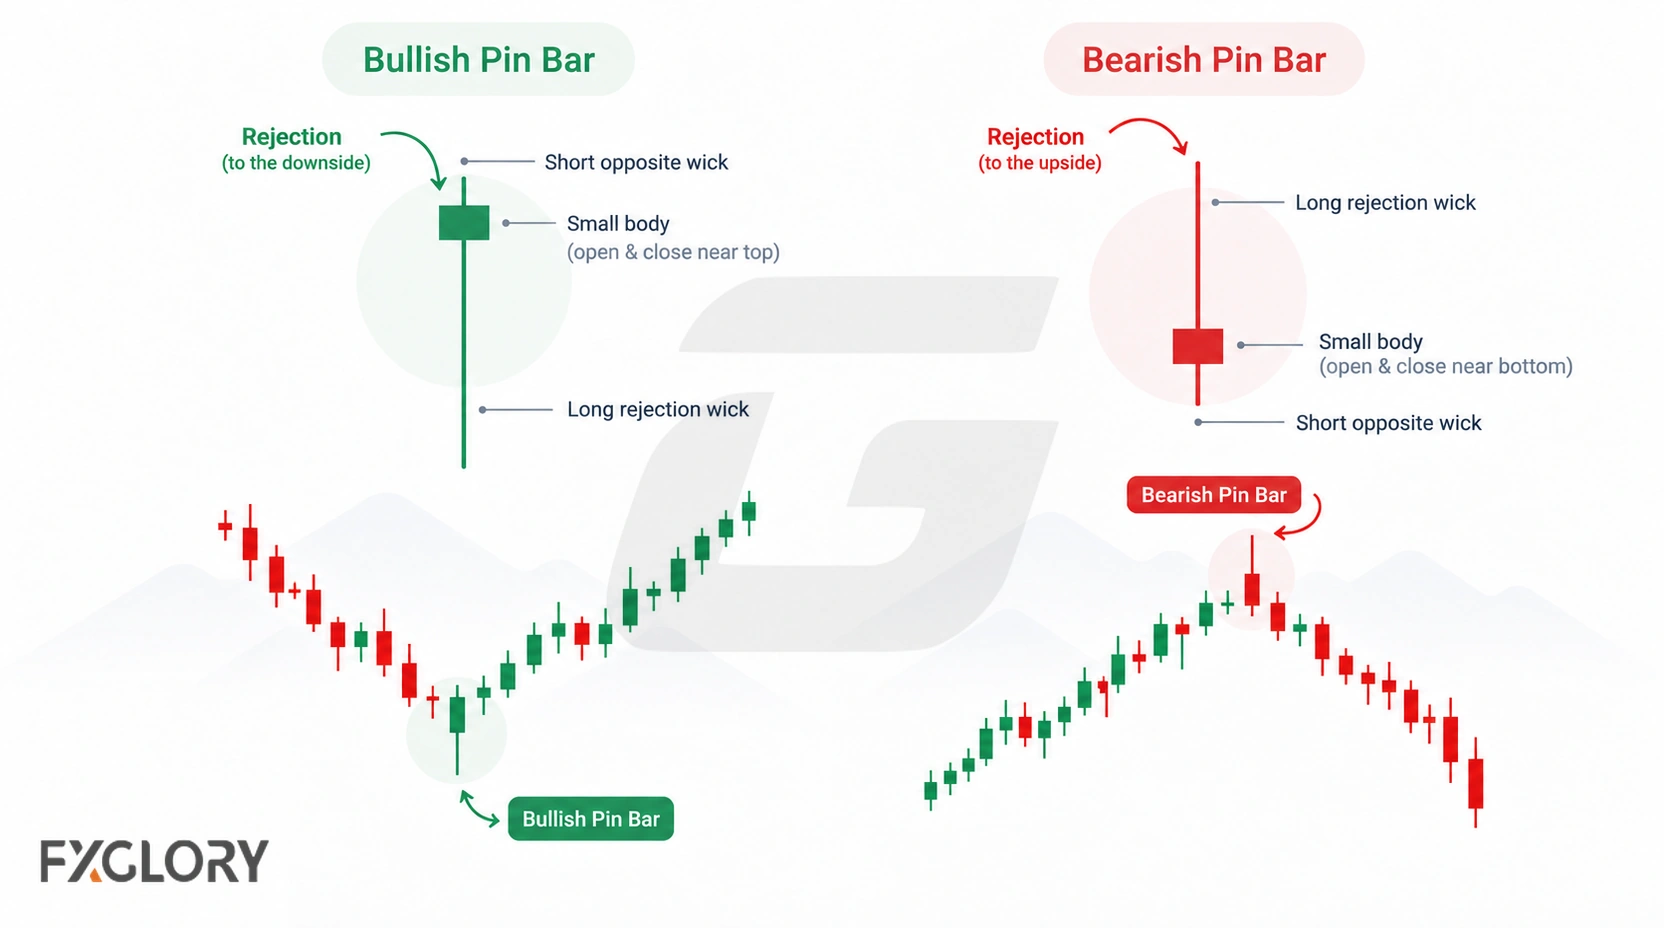
The main test is proportional: one wick should stand out against the real body and the opposite wick, while the body sits toward the other end of the high-low range. There is no universal numerical ratio accepted for every market and timeframe. Compare the shape with nearby candles; a long wick alone is insufficient.
| Part | Identification role | What to check |
|---|---|---|
| Dominant wick | Records an excursion to the high or low followed by a close away from that extreme. | It should be noticeably longer than the body and the opposite wick. |
| Real body | Shows the distance between open and close. | It sits toward one end of the candle rather than in the middle. |
| Close | Establishes the finished candle’s position in its range. | The close is away from the long-wick extreme; the candle must be complete. |
| Full range | Measures high minus low, including the wick. | A striking wick may coincide with wide spreads, news, or unusual volatility; investigate separately. |
Bullish and Bearish Pin Bars
A bullish pin bar has a long lower wick and a body near the upper end of the range: price traded down to a low and finished away from it. A bearish pin bar has a long upper wick and a body near the lower end: price reached a high and finished away from it. These labels describe the wick’s direction, not necessarily whether the body closed green or red.
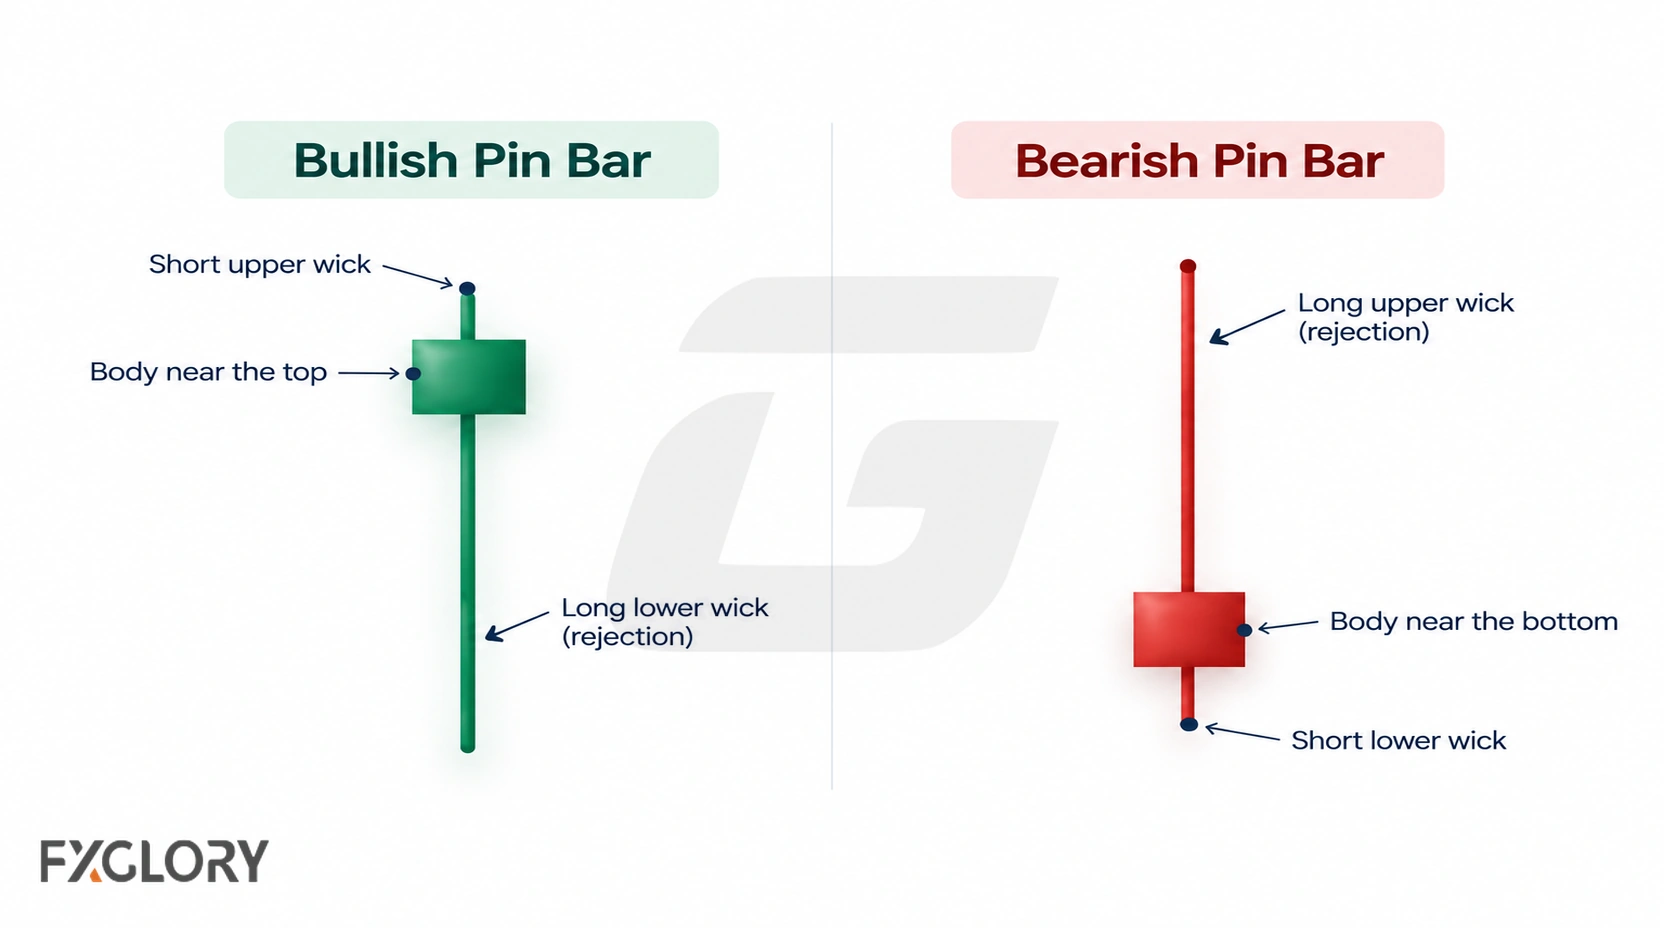
The lower-wick form can be particularly relevant at previously identified support, a swing low, or after a downside probe of a range. The upper-wick form may be examined at resistance, a swing high, or after an upside probe. Neither shape independently confirms that the tested level will hold.
Pin Bar vs Similar Forex Candles
Pin bars overlap with some named candlestick patterns, but the labels are not interchangeable in every chart context.
| Candle | Distinguishing feature | Relationship to pin bars |
|---|---|---|
| Hammer | Small body above a long lower shadow, conventionally after a decline. | Its shape may also qualify as a bullish pin bar. |
| Shooting star | Small body below a long upper shadow, conventionally after a rise. | Its shape may also qualify as a bearish pin bar. |
| Doji | Open and close coincide or nearly coincide. | Body equality, rather than a single dominant wick, defines the label; some variants overlap. |
| Engulfing pattern | Relationship between two consecutive real bodies. | It uses a two-candle comparison instead of one dominant-wick structure. |
See hammer structure, shooting-star structure, and doji candles for the specialist distinctions.
Where Pin Bars Matter in Forex
A pin bar is easier to interpret when the wick tests an area identified before the candle forms. The relevant distinction is not between a good and a random-looking candle; it is whether the chart provides an independent reason to watch the tested area.
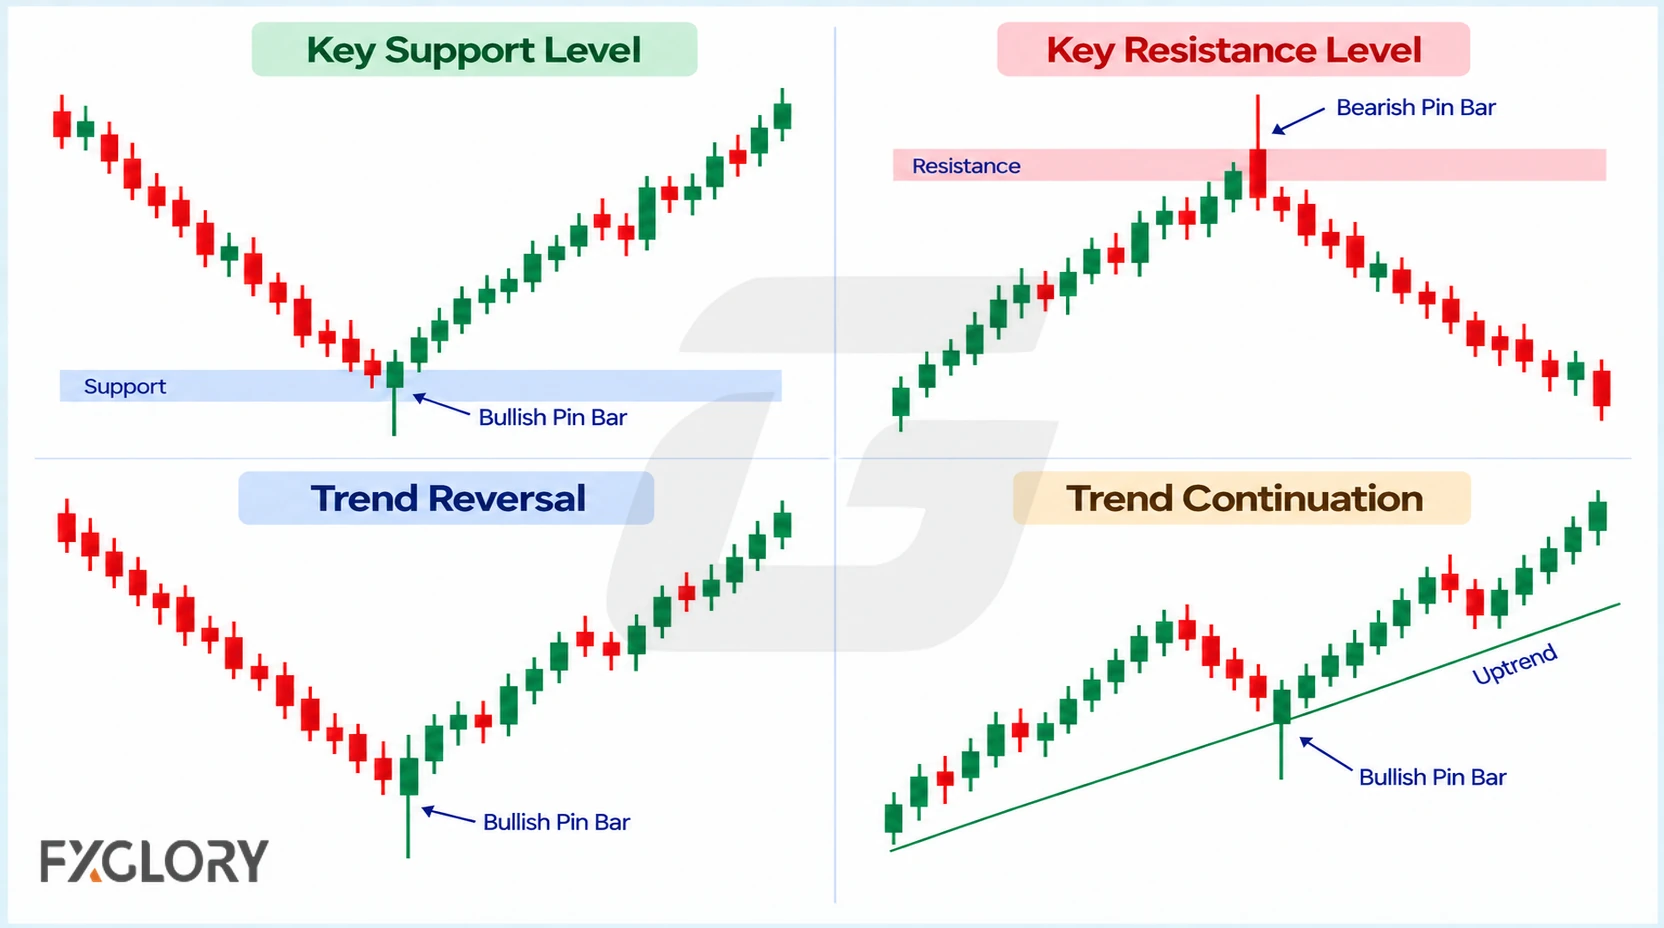
Support, Resistance, and Swing Points
At established support or a prior swing low, a lower wick can show an intraperiod move below a reference area followed by a close back above the low. At resistance or a swing high, an upper wick records the opposite sequence in the period’s prices. Compare the actual wick extreme and close with the boundaries of the zone, rather than assuming any touch was a rejected breakout.
Range Boundaries and Failed Break Attempts
A pin bar near a range edge may show a test beyond that boundary followed by a close back inside. A genuine failed break requires a defined break condition and a subsequent failure of that condition; the wick alone may show only an intraperiod excursion. In the middle of a range, away from its boundaries or another independently marked level, the candle may add little new information.
Trend Context
In an established trend, a pin bar can appear during a pullback, at a continuation level, or near a possible turning point. Prior direction supplies context, but the candle does not tell which of those interpretations will prove correct.
Pin Bar Quality and Context Checklist
Use the following checks to distinguish an unclear shape from a clearly formed candle whose location is uninformative. A valid candle does not become structurally false simply because the market subsequently moves against the expected direction.
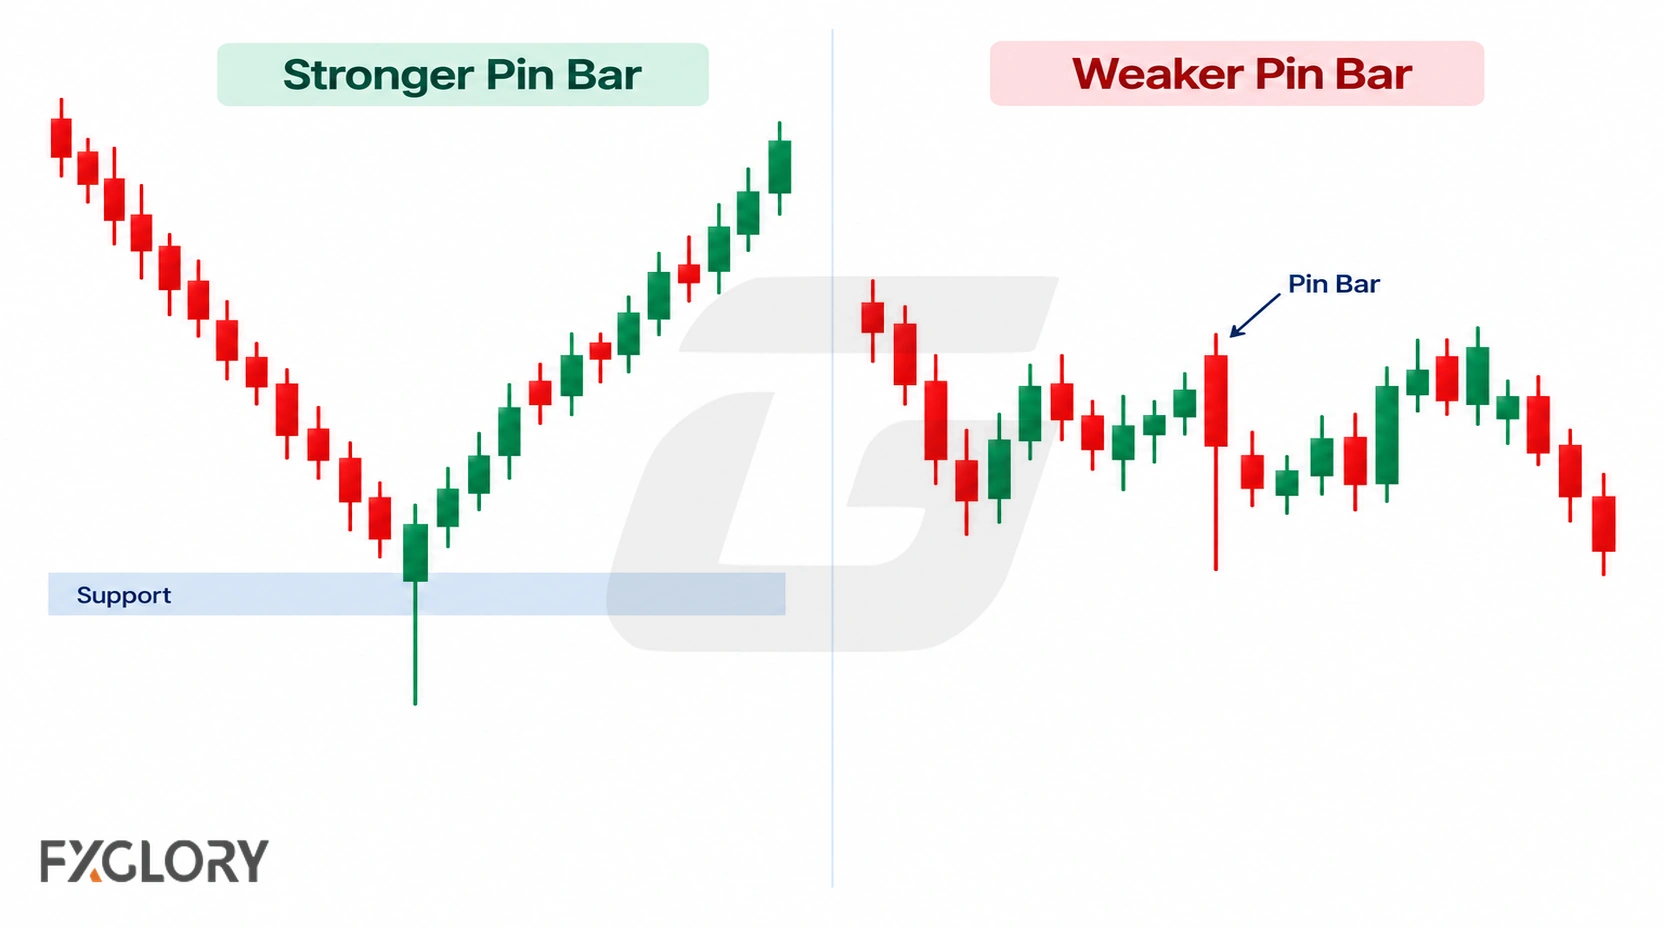
| Check | Clearer observation | Reason for caution |
|---|---|---|
| Structure | One wick dominates and the body lies near the opposite end. | A central body or similarly long wicks may fit another candle type. |
| Location | The wick tests previously identified support, resistance, a swing point, or a range edge. | No relevant level or prior move is evident. |
| Nearby price action | The wick is distinguishable from surrounding candle ranges. | Many neighboring candles have comparable alternating long wicks. |
| Trading conditions | The recorded move can be examined alongside prevailing spreads, liquidity, and known events. | News, rollover, thin liquidity, or unusually wide spreads complicate interpretation; no universal cutoff applies. |
| Later price action | Subsequent closes can be compared with the independently marked level. | Later moves can undermine a level-holding thesis without changing the original candle classification. |
How to Identify and Interpret a Pin Bar
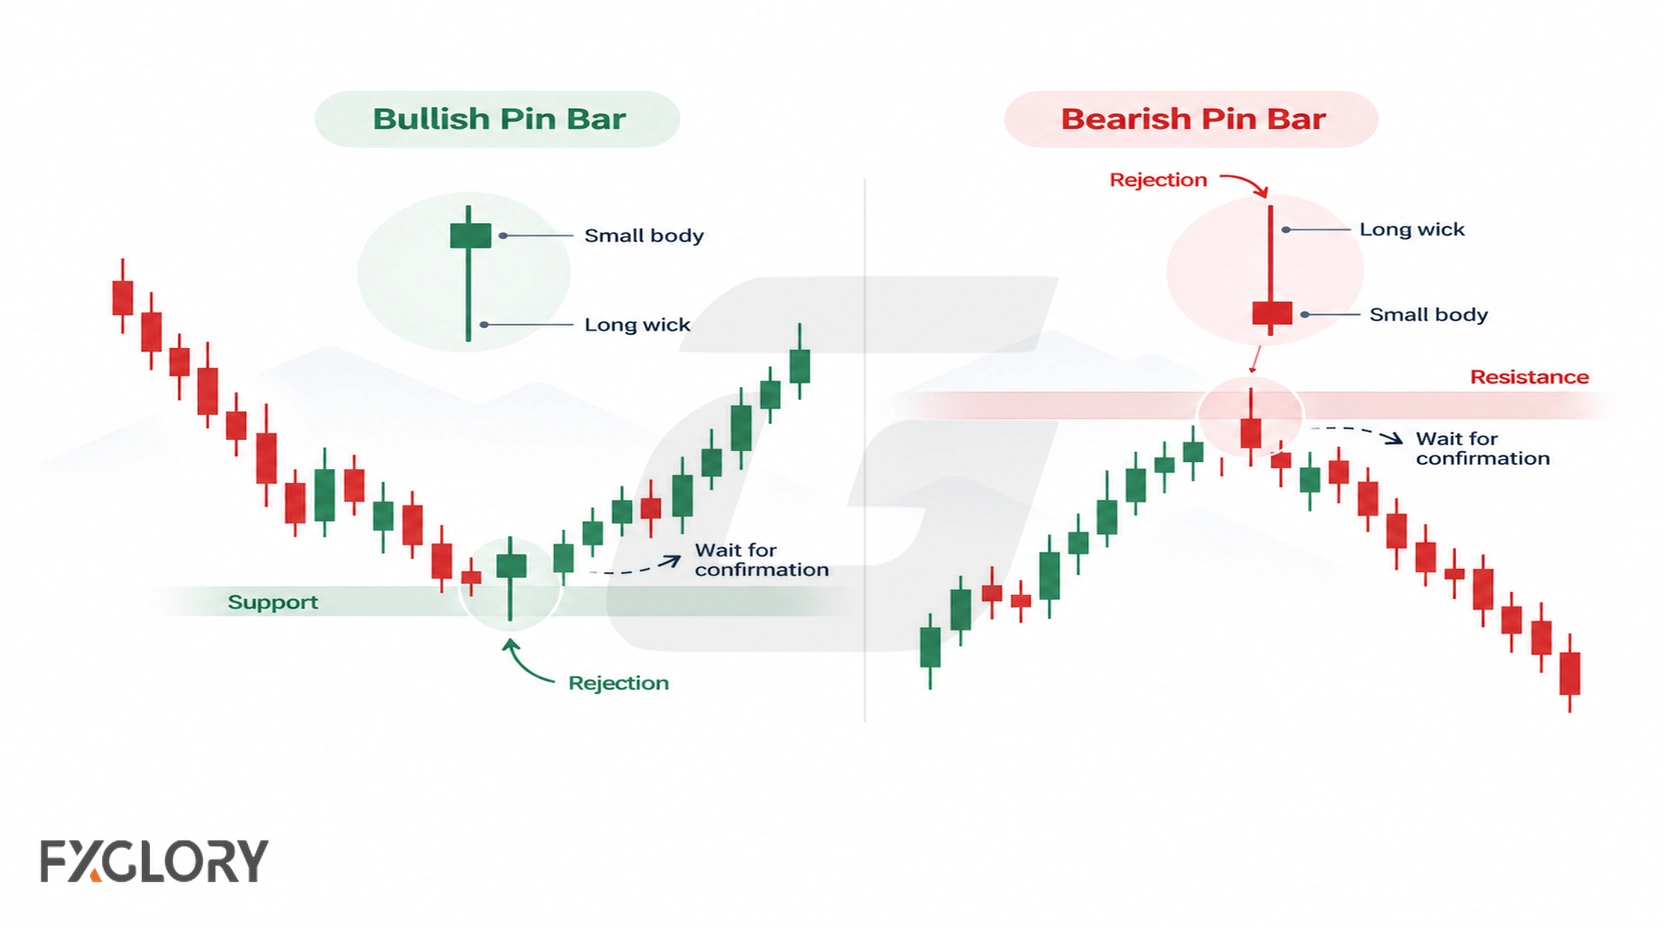
- Wait for completion: An unfinished candle can lose its dominant wick or finish with a different body placement.
- Classify the shape: Compare the dominant wick with the body and opposite wick, and check the close location.
- Mark the reference: Identify support, resistance, a swing point, range boundary, or another relevant price area using earlier candles.
- Review conditions: Inspect spreads relative to the observed move, relevant news, liquidity, and unusual ranges. These factors affect interpretation and potential execution differently.
- Specify follow-up observations: For a lower-wick pin bar at support, check whether later closes stay above or move decisively below the predefined support zone; reverse the comparison for an upper-wick bar at resistance. A retest or follow-through is optional evidence, not a requirement for identifying the candle.
- Keep trade planning separate: A possible entry, stop, position size, and trade-plan invalidation depend on a separately defined strategy and acceptable risk.
Later closes beyond a tested zone can weaken the thesis that the zone held; they do not erase the historical wick or automatically prove that every trade based on the candle would fail.
Unclear, Unconfirmed, and Unsuccessful Pin Bars
The phrase false pin bar is used inconsistently. It is more precise to distinguish three situations:
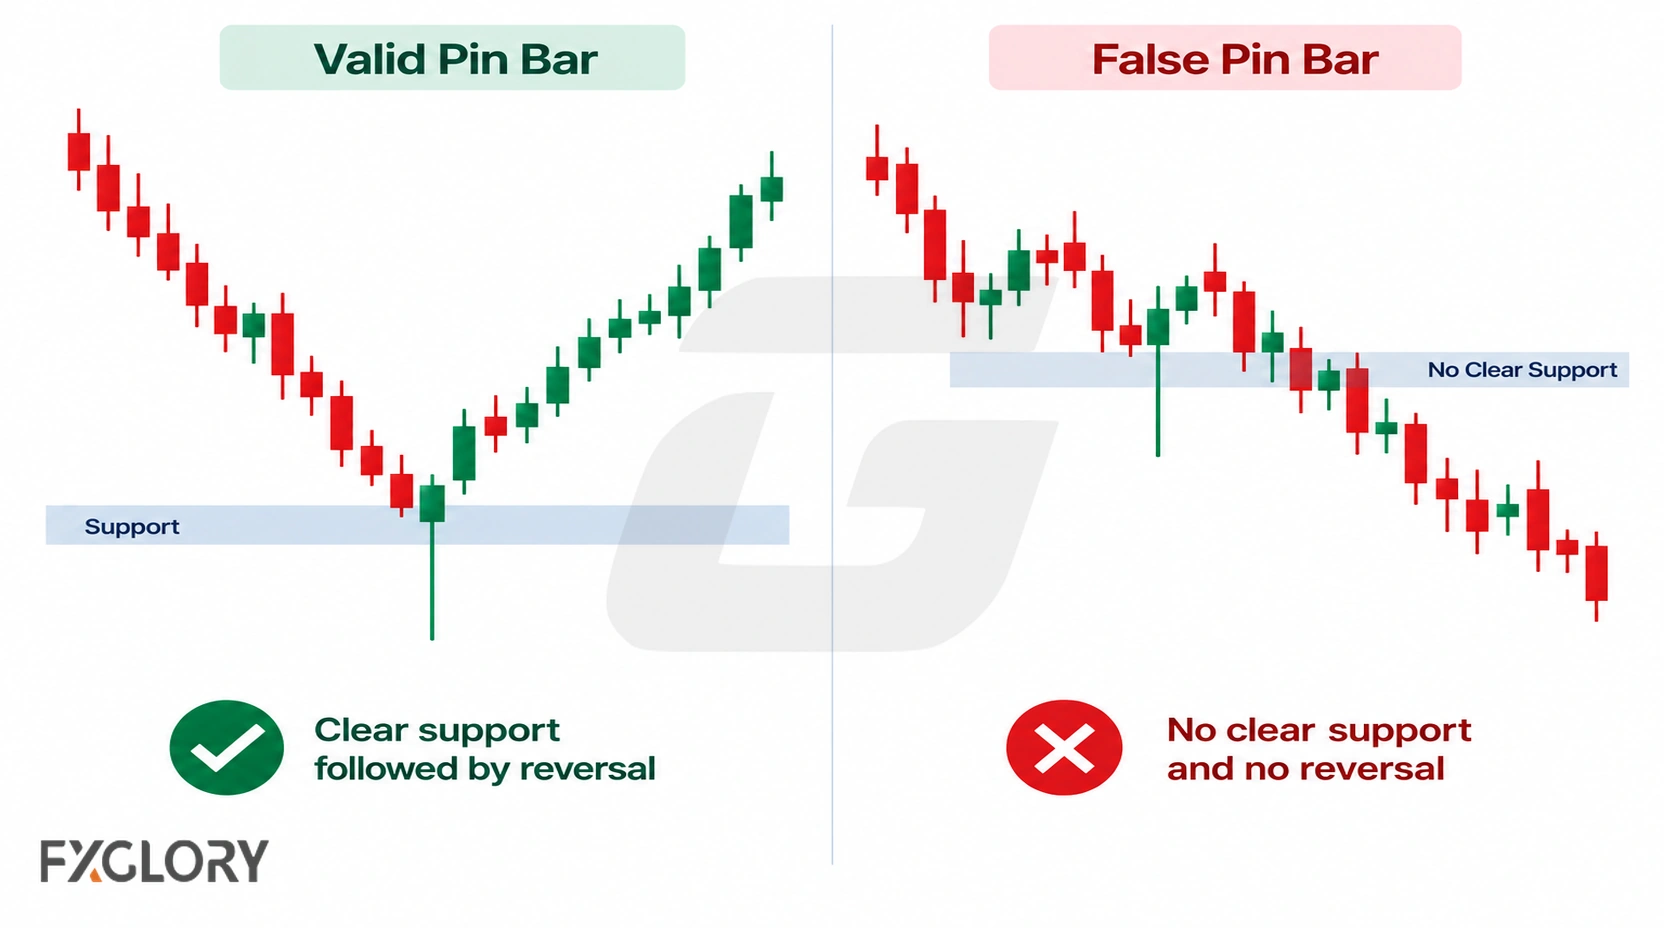
- Not a finished pin bar: The candle is incomplete or finishes without the required dominant wick and body position. This is an identification issue.
- Valid pin bar with weak context: The completed structure is identifiable but appears away from a relevant chart reference or among repeated large, alternating wicks. That limits interpretation, not structural validity.
- Valid pin bar with an unsuccessful directional outcome: Later price breaks through a watched level or fails to move as expected. The observation remains a pin bar; a separate trading plan determines whether a setup was triggered or invalidated.
Long wicks around news releases or low-liquidity periods can be valid shapes while still being difficult to act on at prevailing spreads. Do not infer a profitable opportunity from their appearance alone.
For execution, failed-setup rules, and risk controls, use the Pin Bar Forex Strategy guide.
What to Study After Pin Bars
Compare pin bars with the hammer candle, shooting star, and engulfing pattern. For broader classification, see forex candlestick patterns and reversal candles.