How to take a screenshot on Windows?
Taking screenshots is a useful skill for capturing images of your screen, whether you need to save important information, share what you’re seeing with others, or keep records of your work. Here are two simple methods to take screenshots on Windows.
Using the Print Screen Key
This method is ideal when you want to capture an image of your entire screen.
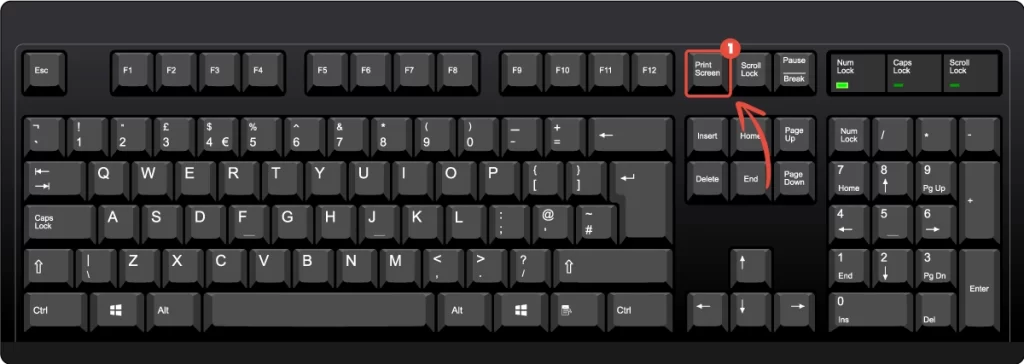
Locate the Print Screen Key. The Print Screen key is usually labeled as PrtScn, PrntScrn, or similar and is typically found in the upper right corner of your keyboard. Press and hold the print screen key. This action captures an image of your entire screen and copies it to your clipboard.
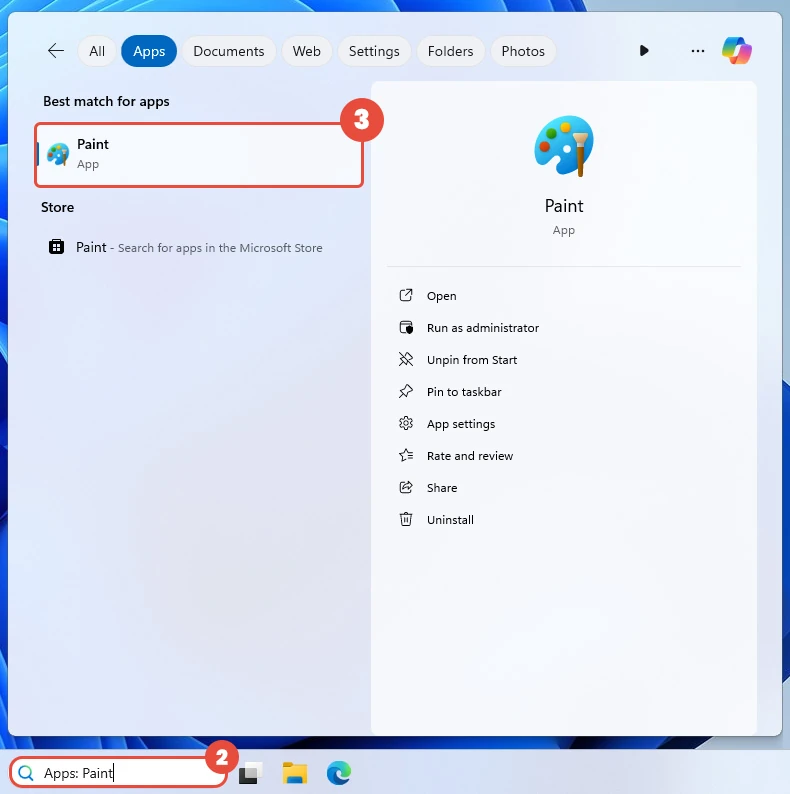
Open an image editing program like Paint.
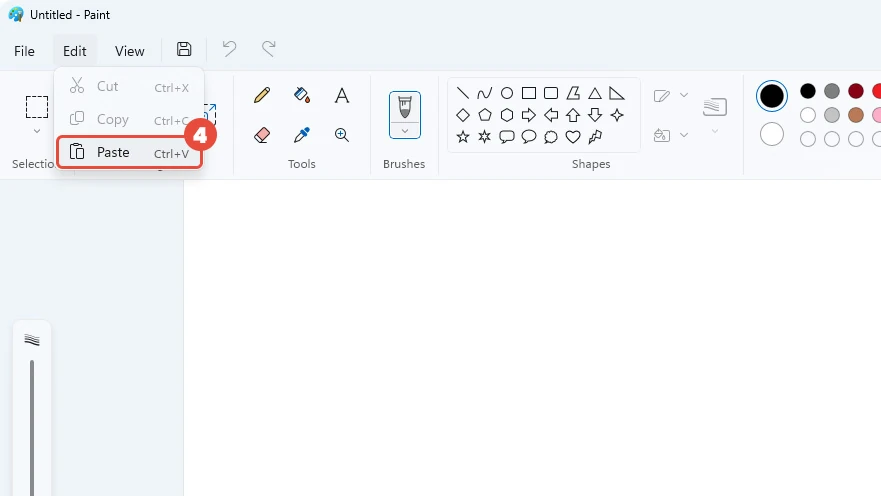
Press “Ctrl + V” to paste the screenshot into the program.
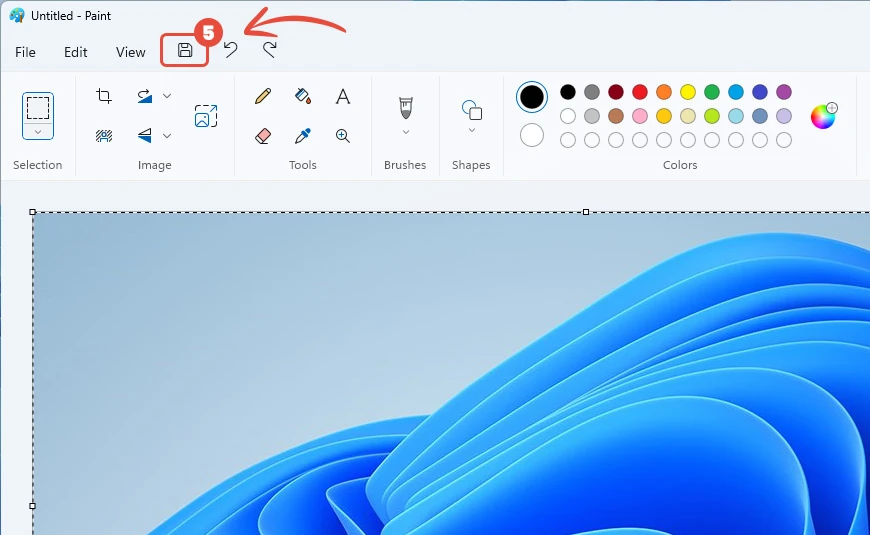
Click on the File menu and select Save As to save your screenshot or click on the save icon. Choose the desired file format (e.g., PNG, JPEG) and location on your computer.
Using the Snipping Tool App to Take a Screenshot
This method is perfect for capturing a specific part of your screen.
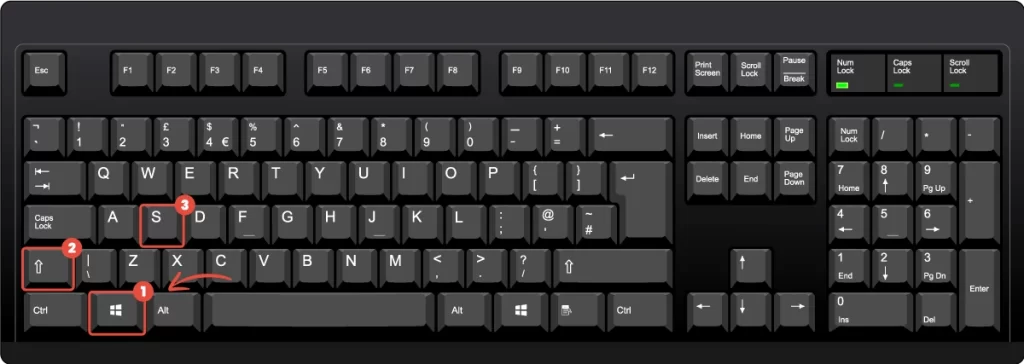
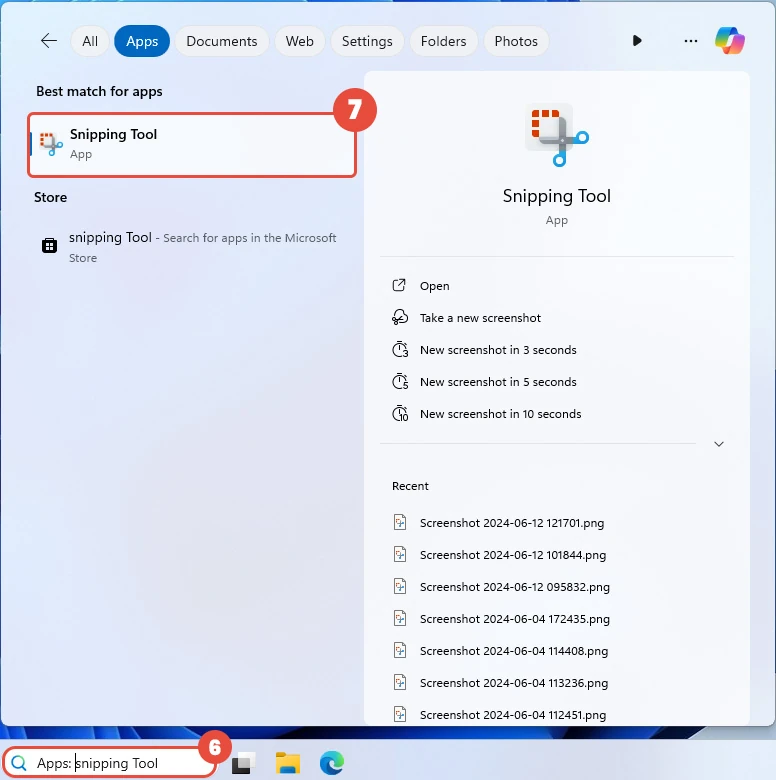
Open the Snipping Tool. You can either search for the Snipping Tool in the Start menu or use the shortcut Shift + Windows + S.
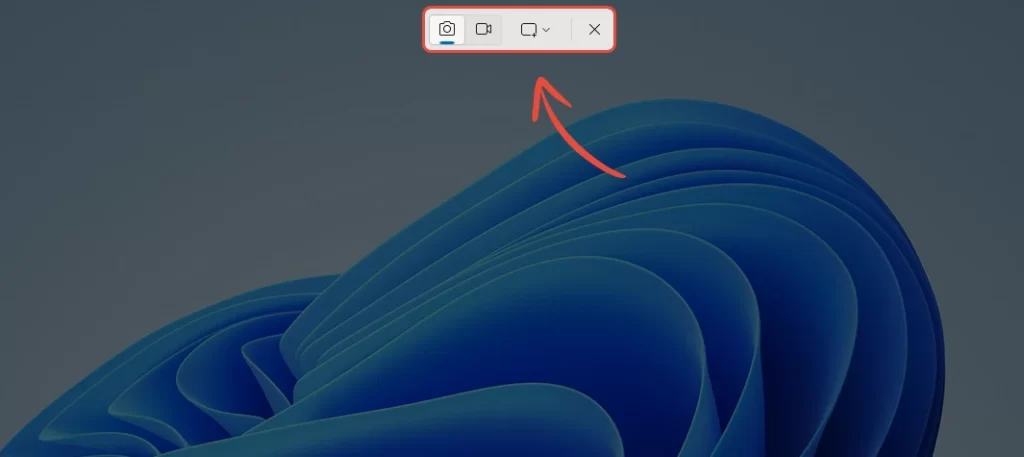
Hold “Shift + Windows + S” together. This action will dim your screen and display a set of snipping tool options at the top of the screen.
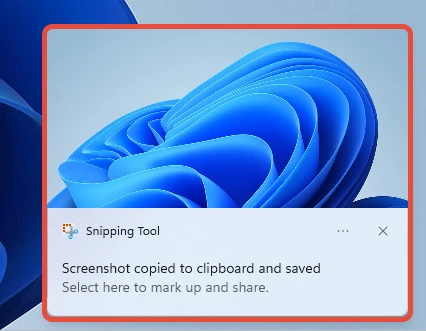
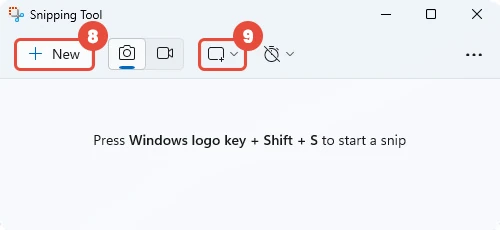
Select the Rectangular Snip tool (the default tool). Your cursor will change to a crosshair. Click and drag to select the area of the screen you want to capture. Release the mouse button to capture the selected area. After taking the screenshot, click on the notification that appears.
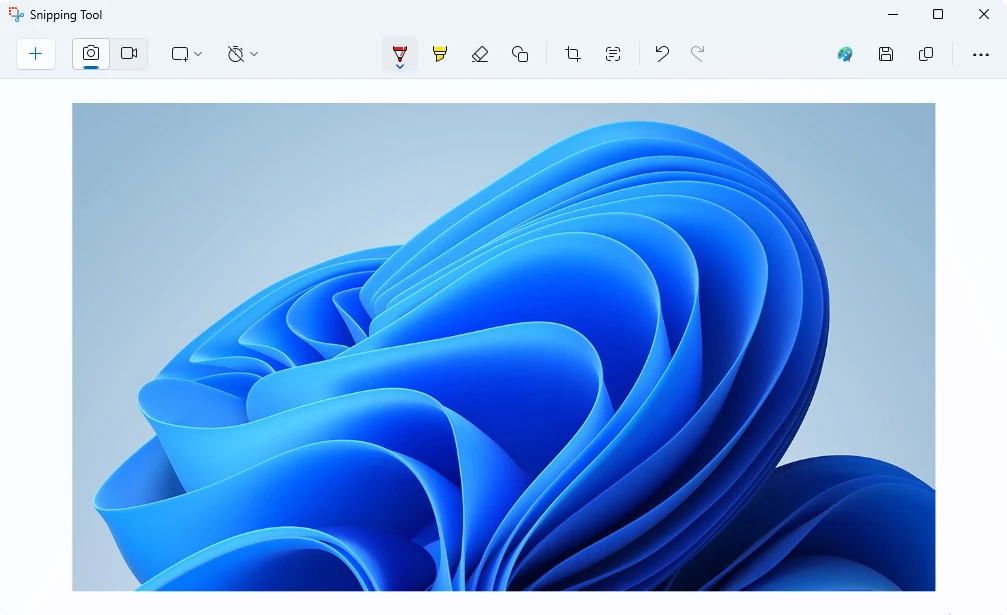
It will open the Snipping Tool where you can edit and save your image.
Alternatively, you can open the Sniping Tool from your Windows Start.
Click on New to start a new snippet. You can take the screenshot like the previous method.
By following these steps, you can easily take and save screenshots on Windows 10 using either the Print Screen key for full-screen captures or the Snipping Tool for partial-screen captures.


