How to take a screenshot on Mac OS
Capturing screenshots on your Mac is straightforward and versatile. Here’s a detailed guide on how to take screenshots using different methods on macOS.
Keyboard Shortcuts for Screenshots
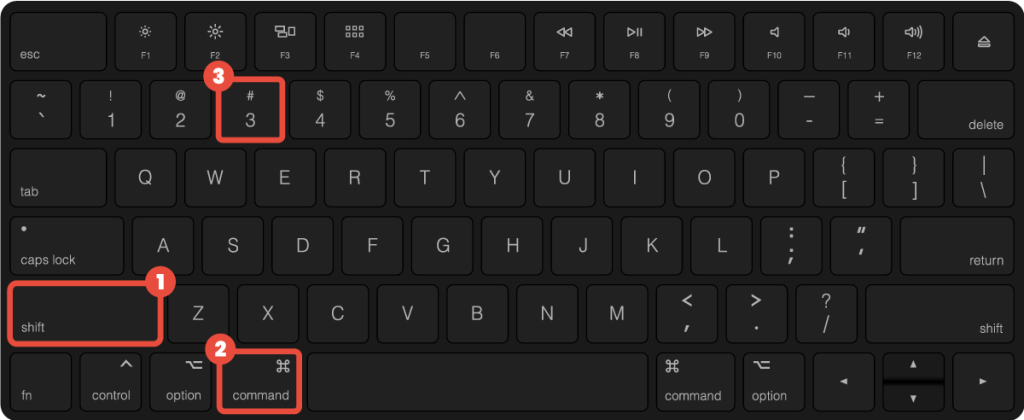
How to capture entire screen on Mac?
To capture the entire screen, press Shift + Command (⌘) + 3. The screenshot will be saved to your desktop by default.
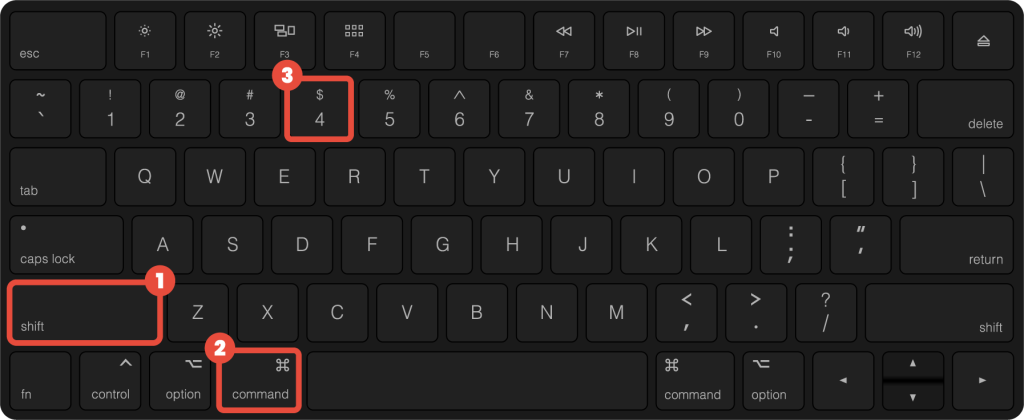
How to capture selected areas on Mac?
To capture a specific part of the screen, press Shift + Command (⌘) + 4. Drag to select the area you want to capture. Release the mouse or trackpad button to take the screenshot.
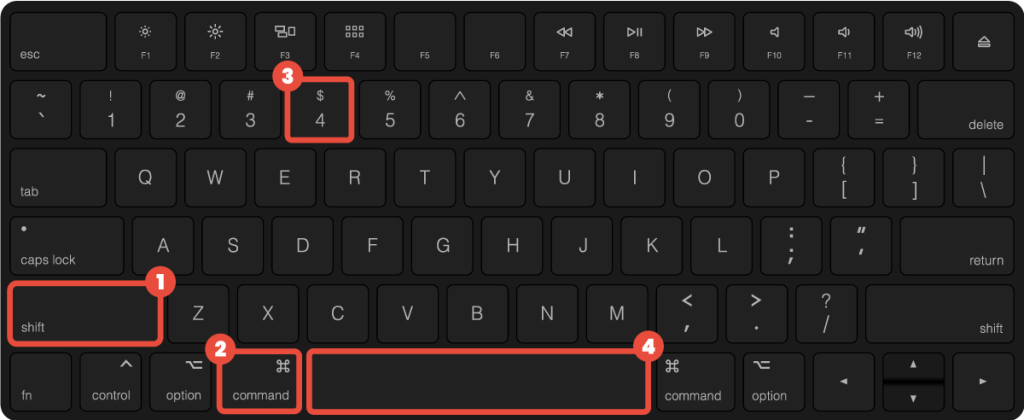
How to capture active window or menu on Mac?
To capture a specific window, press Shift + Command (⌘) + 4. The pointer will change to a camera icon. Click on the window you want to capture.
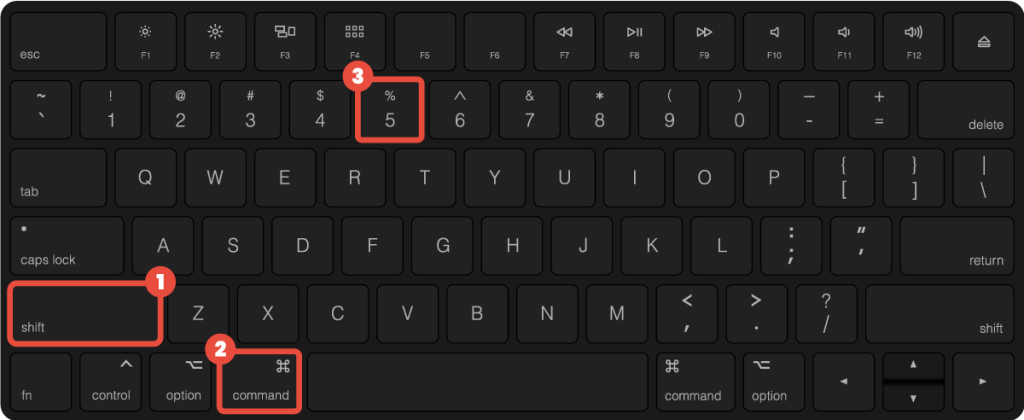
How to open the screenshot tool?
For more advanced screenshot options and screen recording, press Shift + Command (⌘) + 5.The toolbar offers options to capture the entire screen, a selected window, or a selected portion of the screen. You can also start recording your screen from this toolbar.
Where to find Mac screenshots?
On a Mac, screenshots are typically saved to the desktop by default. When you take a screenshot using the shortcuts, the image files are automatically named “Screen Shot [date] at [time].png” and placed on the desktop. This makes it easy to locate your recent screenshots without having to navigate through multiple folders.
If you prefer a different save location, macOS provides an option to change it through the Screenshot app. Simply open the Screenshot app, click on “Options”, and select your desired save location. This flexibility allows users to organize their screenshots according to their workflow needs.


