
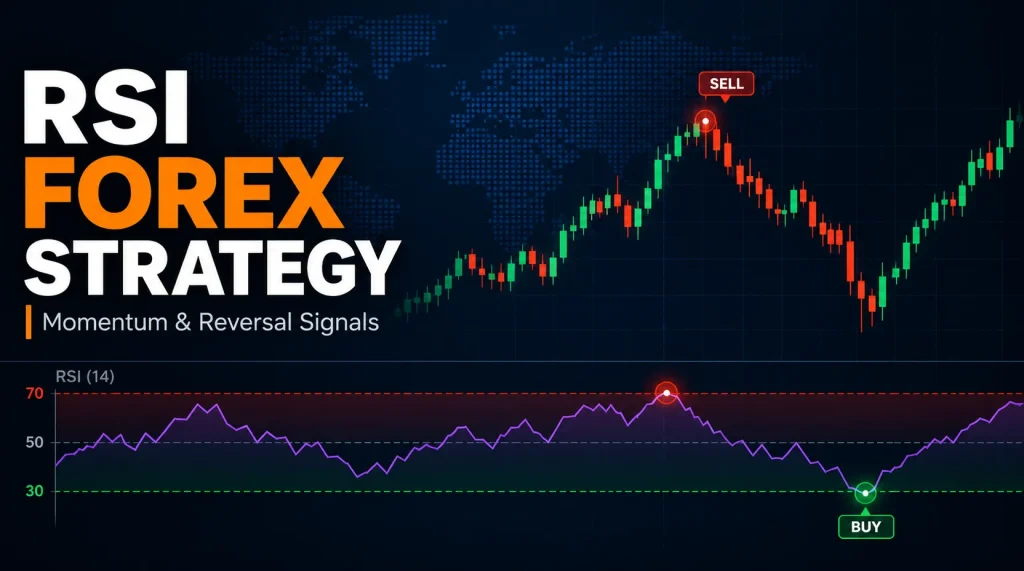
What Is An RSI Forex Trading Strategy?
An RSI forex trading strategy uses the Relative Strength Index to support trading decisions in currency pairs. RSI is an oscillator calculated from recent closing-price gains and losses. It can describe how this balance changes over the chosen lookback period, but it does not directly measure who traded or where an entry belongs.
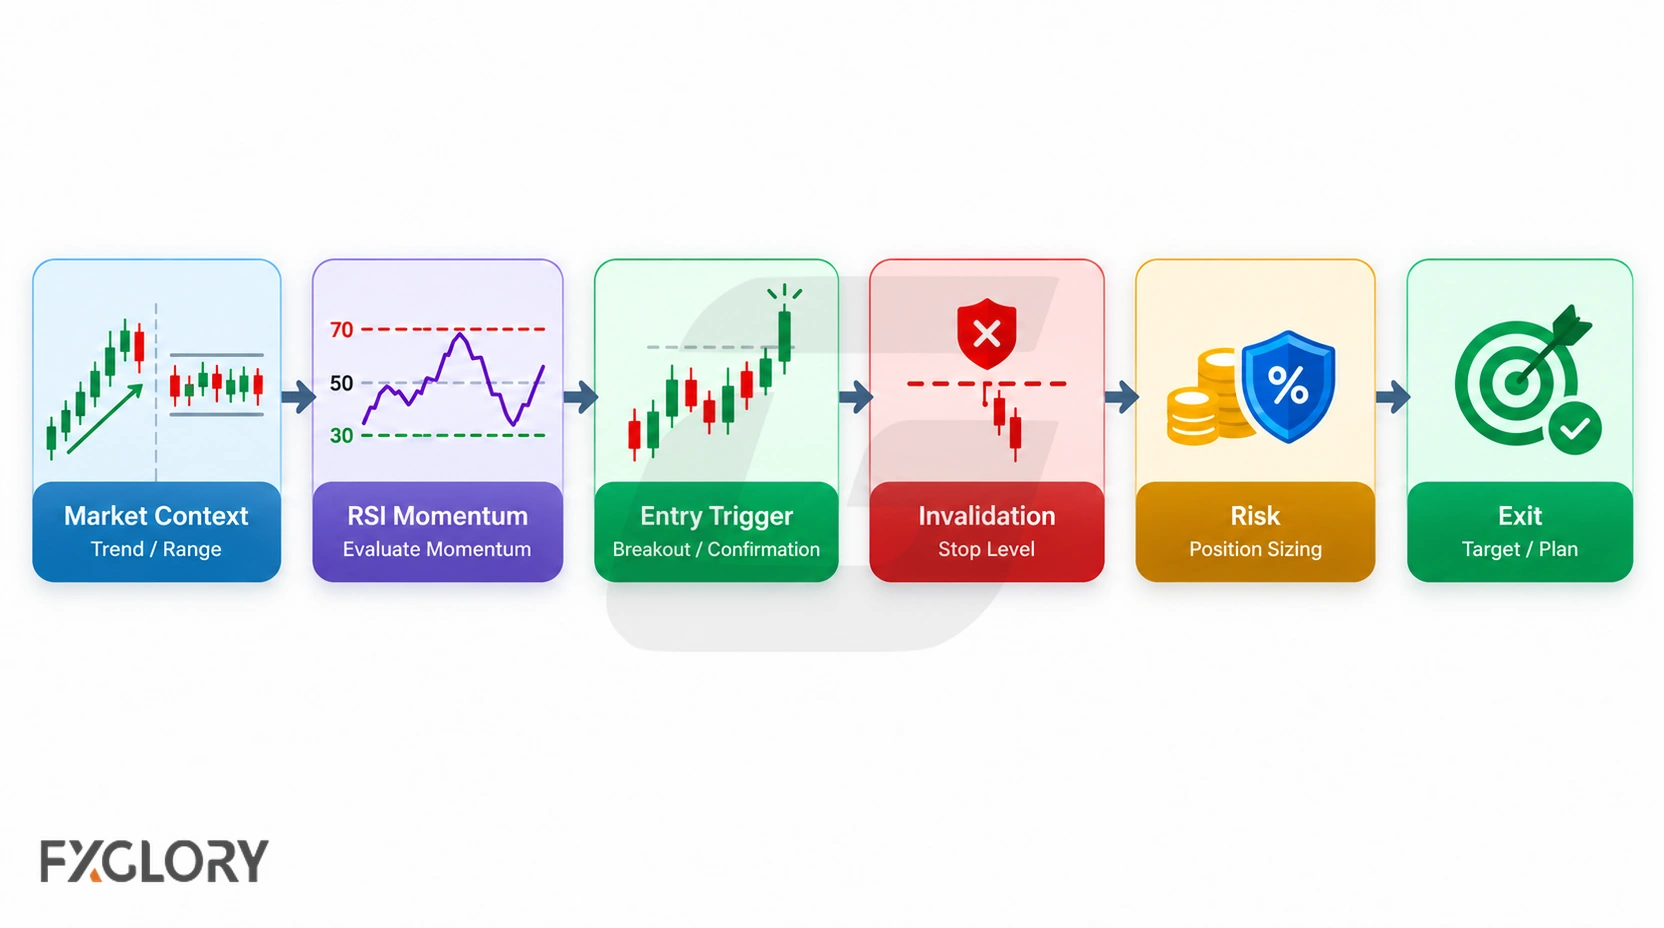
This page focuses on RSI as a strategy tool. For the broader indicator-strategy framework, use forex indicator strategies. For RSI mechanics, calculation background, levels, and indicator basics, use the dedicated Forex RSI guide.
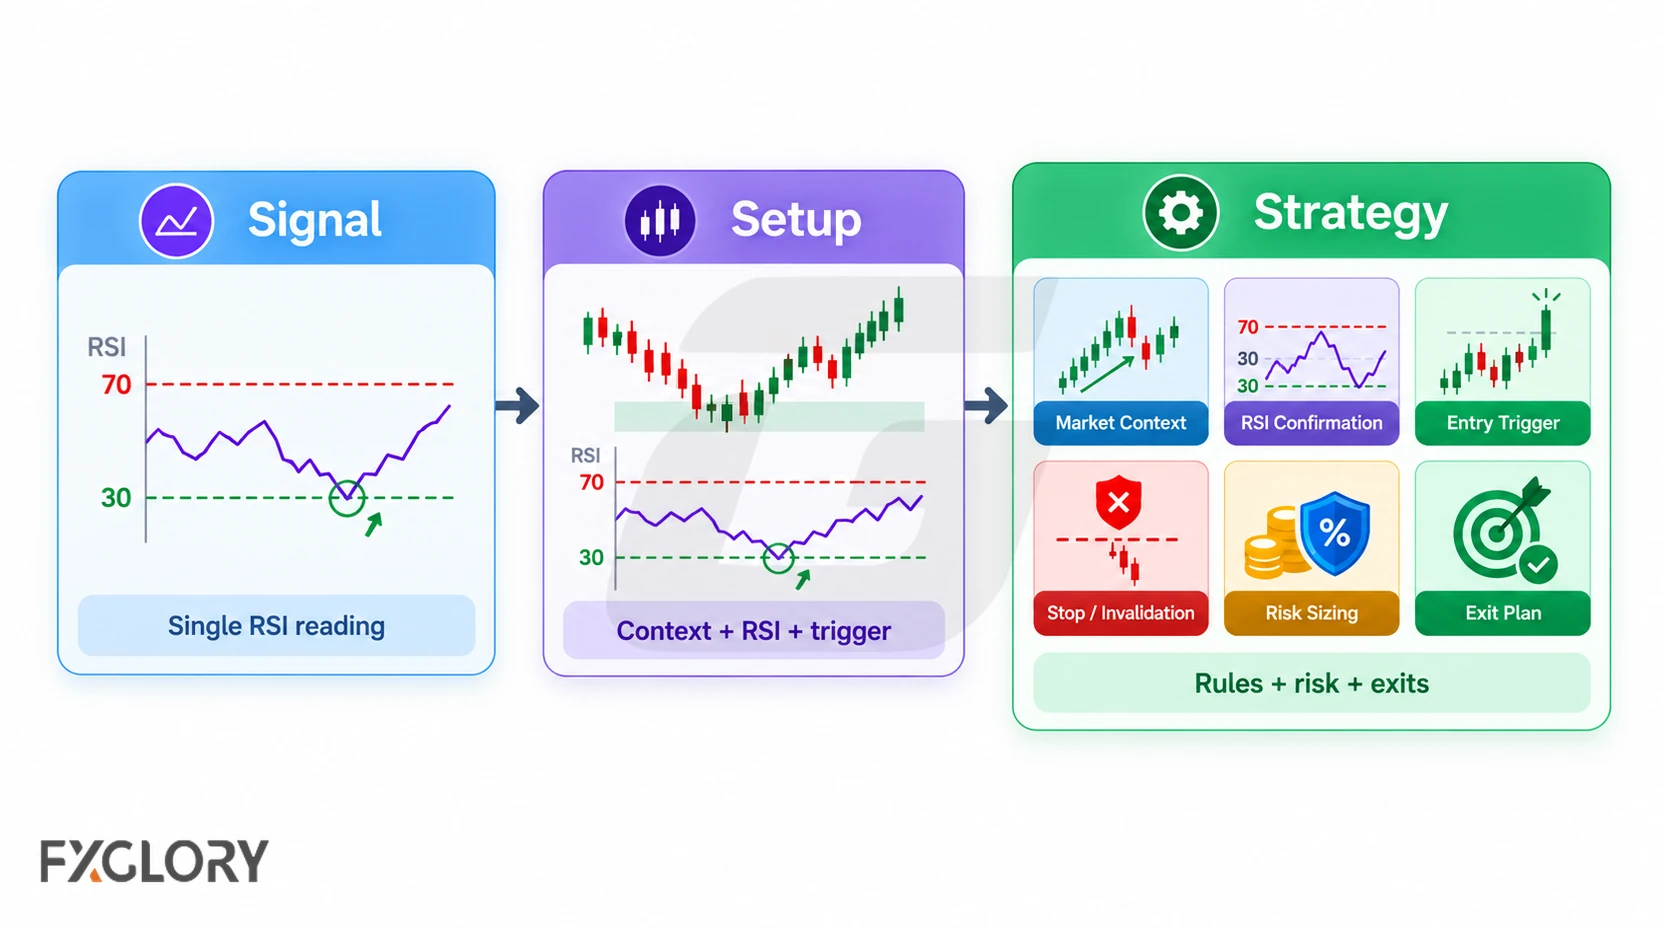
RSI Signal vs RSI Setup vs RSI Strategy
These terms identify different decision stages. For example, an RSI cross above 50 is an indicator event, a pullback at a previously marked level is chart context, and a specified price close may qualify a setup. Entry, exit, and position-risk rules then turn the setup into a testable strategy.
| Term | What It Means | RSI Example |
|---|---|---|
| RSI signal | A reading or event from the RSI indicator | RSI moves above 50 or leaves the oversold zone |
| RSI setup | The chart condition where the RSI reading becomes worth watching | Price tests support while RSI starts recovering from a low reading |
| RSI strategy | The full rule set for trading the setup | Context, trigger, invalidation, risk, exit, and review rules |
| RSI filter | A condition used to accept or reject another trade idea | Only consider pullbacks when RSI holds above or recovers through the 50 area |
Use the forex trading setups framework when an RSI signal needs to become a structured trade idea.
Core RSI Levels: 30, 50, 70, And 80/20
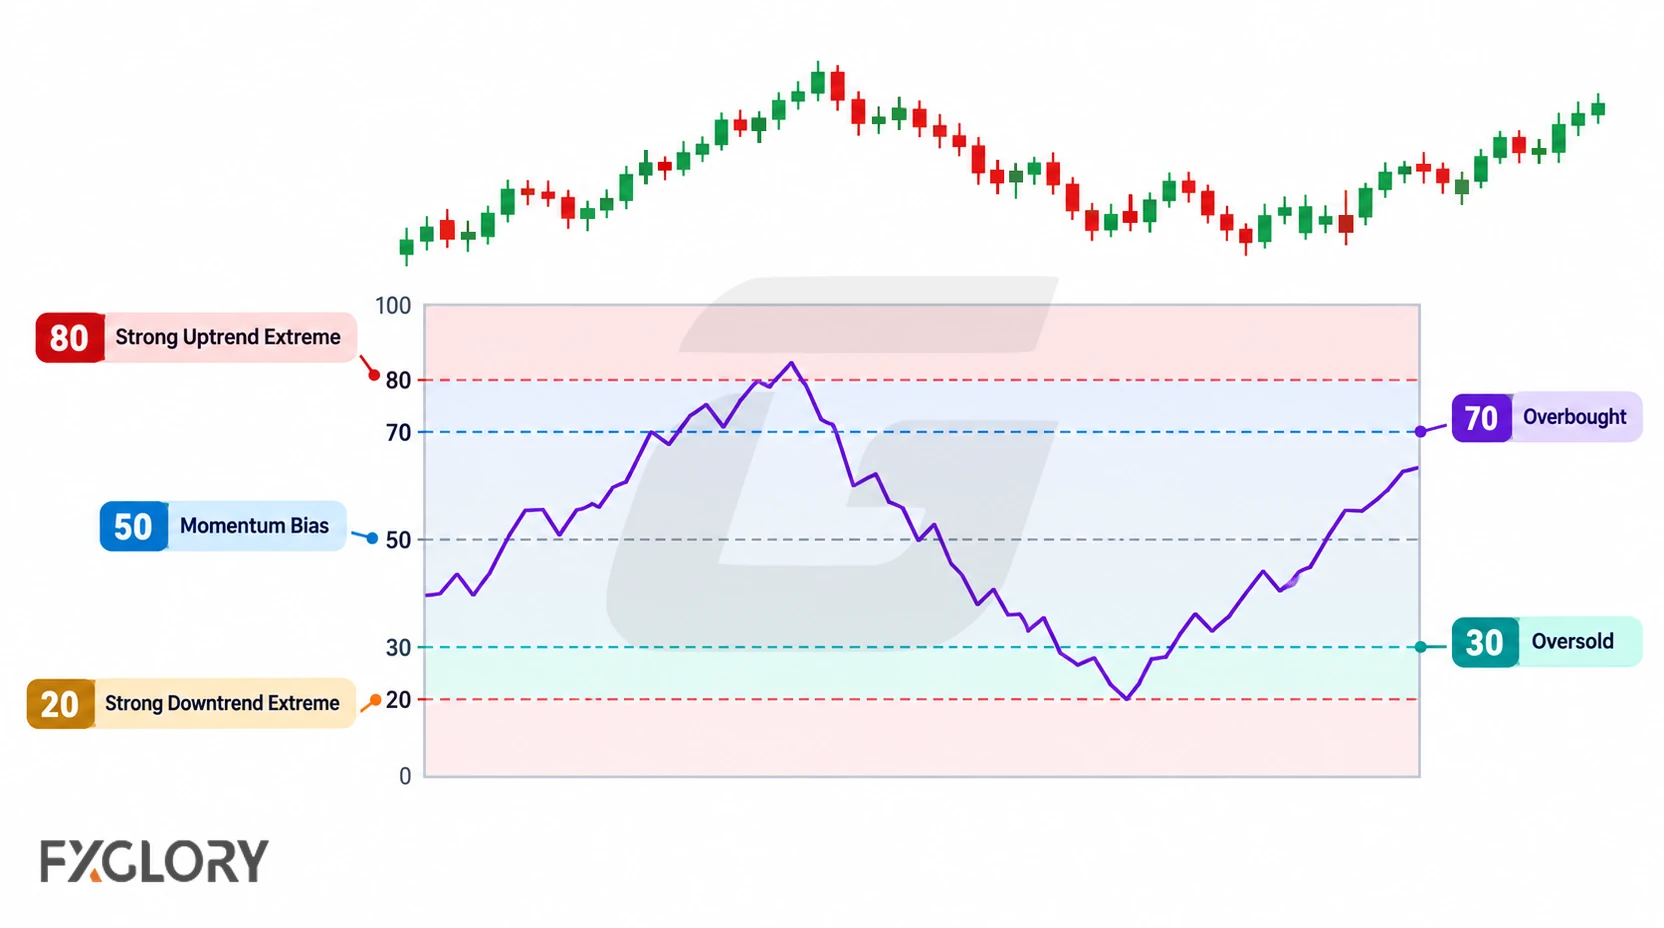
Most traders start with the common RSI levels: 30, 50, and 70. In strategy use, these levels should be read after the market condition is clear. Their role changes with the rule being tested: an extreme reading may be a range-entry filter or a reason to avoid countertrend entries.
| RSI Area | Common Interpretation | Strategy Use | Main Risk |
|---|---|---|---|
| Below 30 | Oversold context | Watch for recovery near support, range lows, or exhaustion conditions | RSI can stay low during strong bearish trends |
| Above 70 | Overbought context | Watch for weakness near resistance, range highs, or exhaustion conditions | RSI can stay high during strong bullish trends |
| Around 50 | Momentum balance area | Use as a confirmation filter for bullish or bearish momentum context | Can whipsaw in sideways markets |
| 80/20 | Stricter extreme filter | Use for more selective overbought or oversold review in stronger movement | Fewer signals and possible late reaction |
In the standard Wilder RSI calculation, a reading above 50 means the smoothed average gain exceeds the smoothed average loss; below 50 means the reverse. This describes the calculation, not a forecast. A reading can remain beyond 70 or 30 across multiple completed candles in a sustained trend.
The 80/20 levels can reduce some early 70/30 warnings by waiting for more extreme RSI conditions. They can also delay entries and should not be treated as a superior setting without testing across the pair, timeframe, spread conditions, and strategy rules.
Best Market Conditions For RSI Forex Strategies
RSI behaves differently across market conditions. The same RSI reading can mean different things in a trend, range, breakout, or news-driven move.
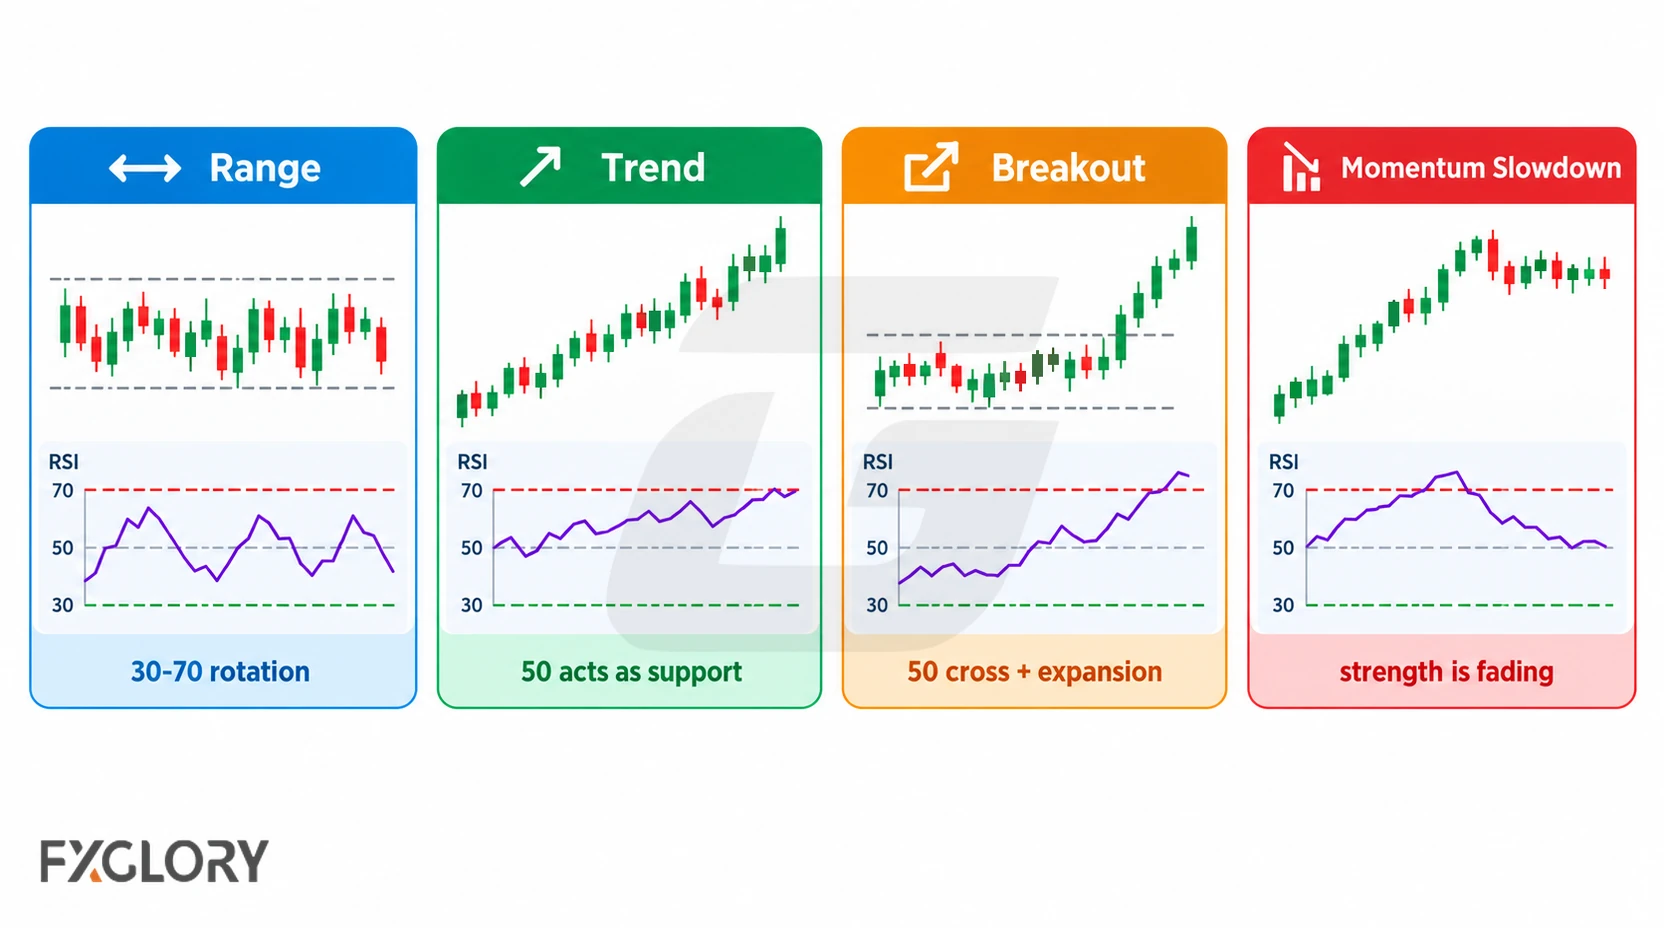
| Market Condition | RSI Use | Better Focus | Skip When |
|---|---|---|---|
| Sideways range | Overbought and oversold reactions | RSI near support or resistance | The range breaks or becomes too narrow after spread |
| Clear trend | Pullback and momentum continuation | RSI recovery with trend direction | RSI is used to fight a strong trend without confirmation |
| Momentum slowdown | Divergence warning | RSI divergence near a meaningful level | Divergence appears without price confirmation |
| Compression or breakout | Momentum confirmation | RSI supports the breakout only after structure is clear | The breakout is a fast spike with unclear invalidation |
| Event volatility | Usually a caution filter | Wait until risk and spread are definable | News changes the market before the setup can be managed |
When RSI is used with directional movement, review forex trend behaviour. When RSI is used near levels, review support and resistance in forex.
RSI Forex Trading Strategy Types
The following examples distinguish different uses of RSI. Their illustrative conditions are not the rules used in the educational test later on this page; that model has its own protected settings and definitions.
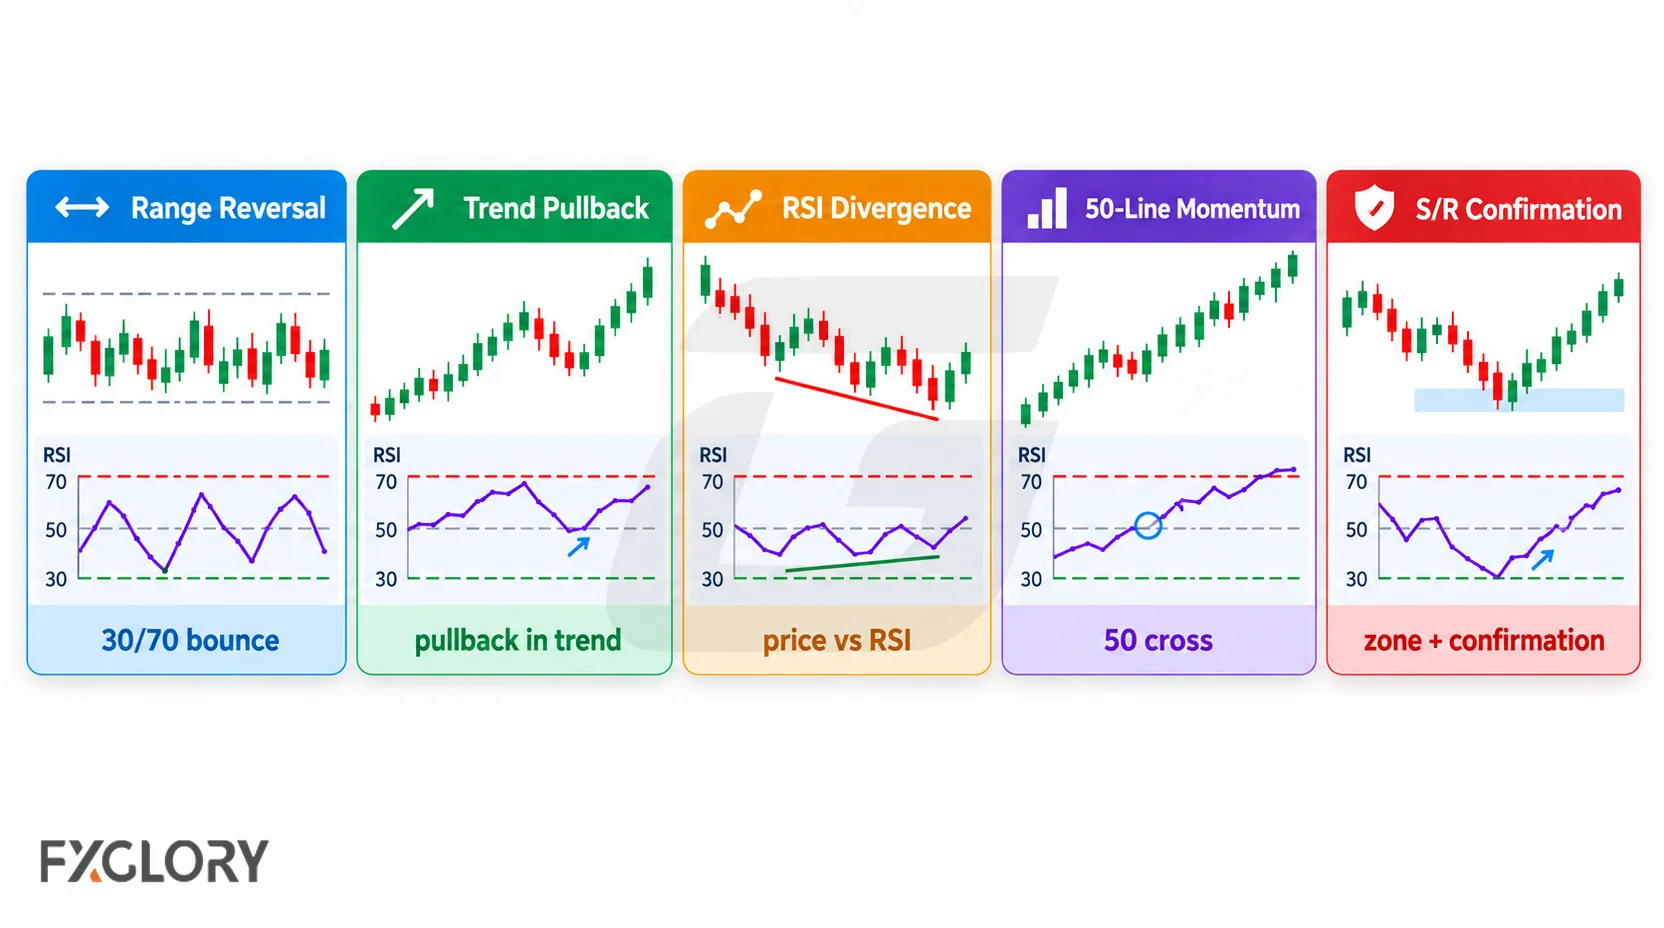
RSI Range Reaction Strategy
An RSI range reaction strategy watches how RSI behaves when price approaches support or resistance. In a range, RSI near 30 may support a possible reaction from support, while RSI near 70 may support caution near resistance. The range boundary provides a price reference that an RSI reading alone cannot supply.
- Context: Price is rotating between visible support and resistance.
- RSI role: For an illustrative long setup, record a move back above 30 following a completed below-30 reading; reverse the comparison near 70 for a short setup.
- Trigger: Define a completed candle closing away from the previously marked range boundary, rather than RSI alone.
- Invalidation: For the long example, a completed close below the marked range low, if that is the chosen structural rule; reverse for the short.
- Skip rule: Skip if the range is too narrow after spread or the boundary is breaking.
RSI Trend Pullback Strategy
An RSI trend pullback strategy uses RSI to review momentum during a pullback. In an uptrend, the trader may watch whether RSI cools without fully breaking the bullish momentum context. In a downtrend, RSI may help review whether a bounce is only a pullback inside bearish structure.
- Context: Price shows a clear directional structure.
- RSI role: Observe a decline and later rise in RSI during a bullish price pullback, or the reverse during a bearish pullback; specify the RSI bars compared.
- Trigger: For example, require a completed close beyond the pullback’s most recent local swing high in an uptrend.
- Invalidation: Define a close beyond the pullback swing low for that long example, separately from any stop or position-size decision.
- Skip rule: Skip if RSI is used to predict reversal against a strong trend without confirmation.
RSI Divergence Strategy
RSI divergence appears when price and RSI move out of alignment. For example, price may make a new high while RSI fails to make a new high, or price may make a new low while RSI fails to make a new low. To identify divergence consistently, match two completed price swing points with RSI values from the corresponding bars. A bullish example has a lower price low and a higher RSI low; bearish divergence reverses those comparisons. For the broader classification of bullish, bearish, and hidden divergence, see the dedicated guide. A divergence observation is separate from any subsequently specified entry condition.
- Context: Divergence is clearer near support, resistance, or an extended move.
- RSI role: Identify the direction of the difference between two corresponding completed price and RSI swing points.
- Trigger: An illustrative bullish plan might require a completed close above an intervening price swing high after a bullish divergence.
- Invalidation: For that plan, specify whether a later close below the second divergence price low invalidates the proposed trade. Subsequent price action does not erase the historical divergence.
- Skip rule: Skip if divergence appears in the middle of unclear price action.
RSI 50-Line Momentum Strategy
The RSI 50 line can be used as a momentum filter. RSI above 50 reflects a larger smoothed average gain than loss in the standard formula; below 50 reflects the opposite. The 50 line is often more useful as confirmation than as a standalone entry.
- Context: Price structure already suggests direction.
- RSI role: For example, use a completed RSI cross above 50 as a long-side filter or a cross below 50 as a short-side filter.
- Trigger: Separately define a completed price close beyond a previously identified swing or range boundary.
- Invalidation: Specify the price level that would invalidate that breakout, regardless of the RSI reading.
- Skip rule: Skip when RSI repeatedly crosses 50 in a flat market.
RSI Trendline-Break Confirmation
A trader may draw a line through two earlier confirmed RSI swing highs or lows and observe whether a subsequent completed RSI value crosses it. The line depends on the selected pivot rule and should not be treated as an objective signal until those pivots and crossing conditions are specified.
- Context: Price is near a meaningful level, trend structure, or extended move.
- RSI role: A completed RSI value crosses the specified line drawn from previously identified RSI pivots.
- Trigger: A separately chosen completed close through a corresponding price swing level.
- Invalidation: For a proposed long entry, define a close below the relevant price swing low; reverse the rule for a short.
RSI With Support And Resistance
Unlike a range-only reaction, this approach can examine earlier price levels in a trend, such as a prior breakout boundary or a higher-timeframe swing level. Mark the level from earlier candles before evaluating whether RSI and subsequent price closes meet the written criteria.
- Context: Price reaches a level defined from prior highs, lows, or a completed breakout.
- RSI role: Specify a cross, direction change, or divergence observation at that level.
- Trigger: Require a completed close on the selected side of the marked level or another stated structural test.
- Invalidation: Define the contrary price close or stop rule; do not assume all level tests have the same threshold.
RSI With MACD Or Moving Averages
RSI can be combined with MACD or moving averages when each tool has a separate role. A moving average can act as a trend filter, MACD can support momentum confirmation, and RSI can help judge overbought, oversold, or momentum recovery conditions.
A full RSI and MACD strategy would need separate rules for market condition, trigger, invalidation, risk, and exit. This section only explains role separation so the main RSI page does not become an indicator-combination article.
- Do not use RSI, MACD, and another momentum tool just to repeat the same signal.
- Use one tool for trend or direction, one for momentum, and price structure for invalidation.
- Skip the setup if the tools conflict and the chart context is unclear.
For dedicated RSI combination examples, review ADX and RSI Strategy and Bollinger Bands and RSI Strategy. For broader pairing logic, use forex indicator combinations.
RSI Settings And Timeframes
The 14-period RSI is commonly used, but RSI settings should be chosen for the strategy being tested. Fix the chosen settings during the evaluation sample, and test any changed parameters on a distinct sample rather than repeatedly adjusting them after individual outcomes.
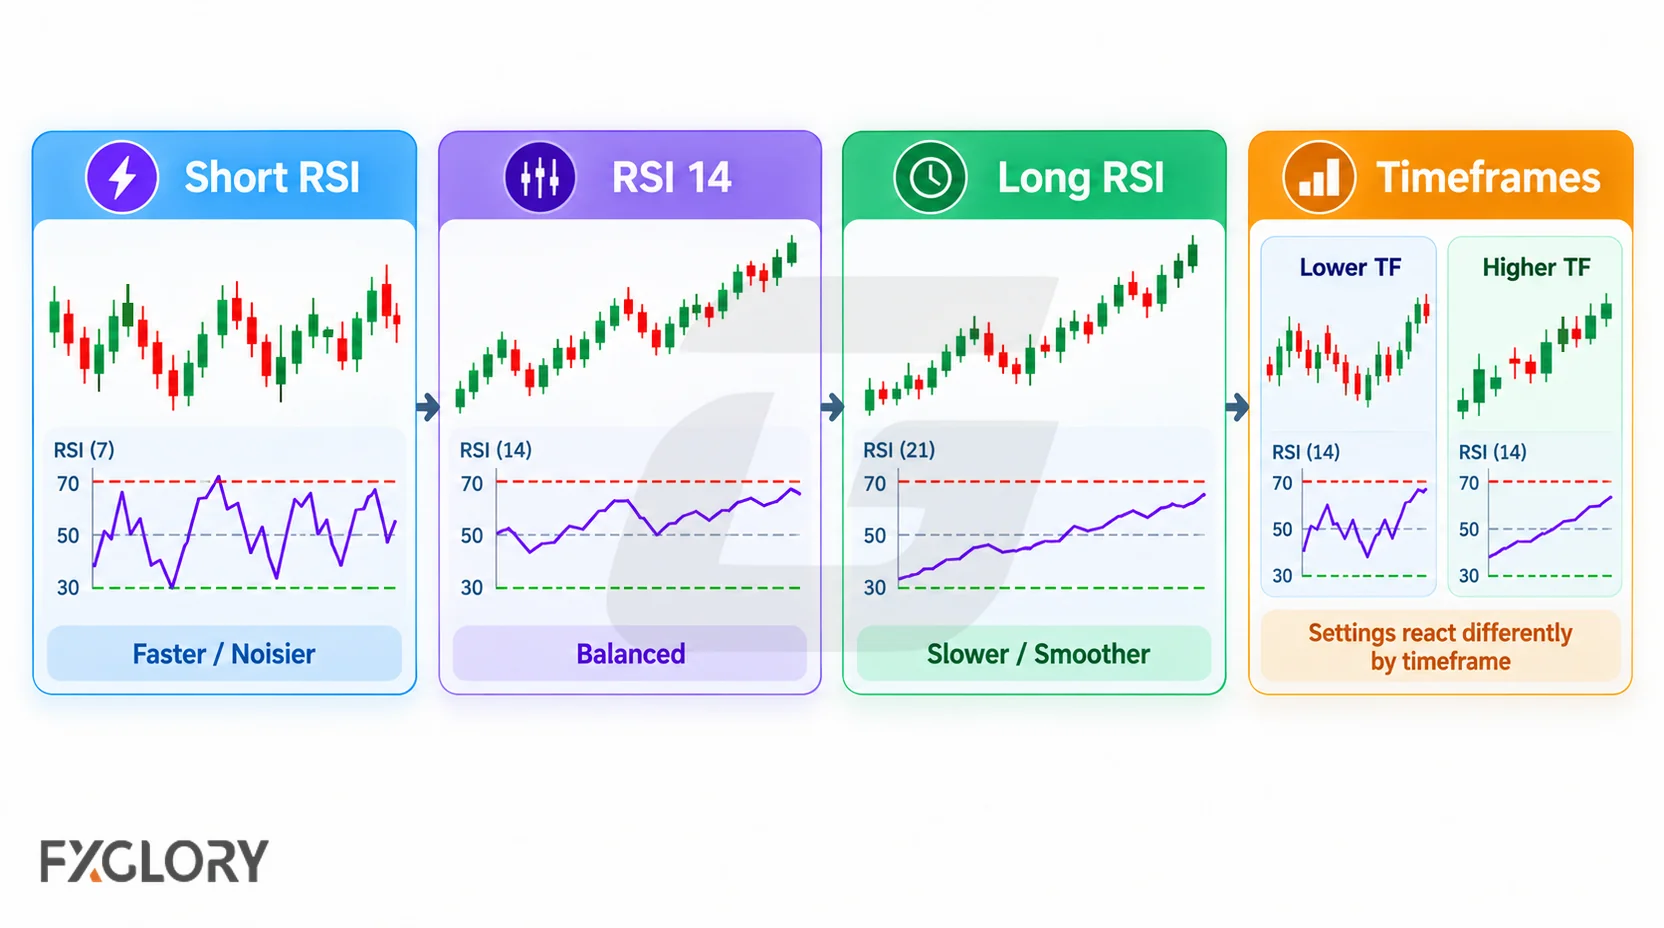
| RSI Setting Choice | Possible Effect | Main Risk |
|---|---|---|
| Shorter RSI setting | Faster signals and more reactions | More noise and false signals |
| Longer RSI setting | Smoother signals and fewer reactions | Later confirmation |
| 70/30 levels | Standard overbought and oversold review | Can fail in strong trends |
| 80/20 levels | Stricter extreme filter | Fewer signals, delayed entries, and fewer examples to review |
| 50-line filter | Momentum direction context | Whipsaws in ranges |
Shorter timeframes can create more RSI signals, but they can also make spread and timing more important. Before testing short-term RSI methods, review FXGlory spreads.
RSI Multi-Timeframe Confirmation
Specify which timeframe provides context and which determines the entry. A completed higher-timeframe bar must not be replaced by information that was unavailable when the lower-timeframe decision was made.
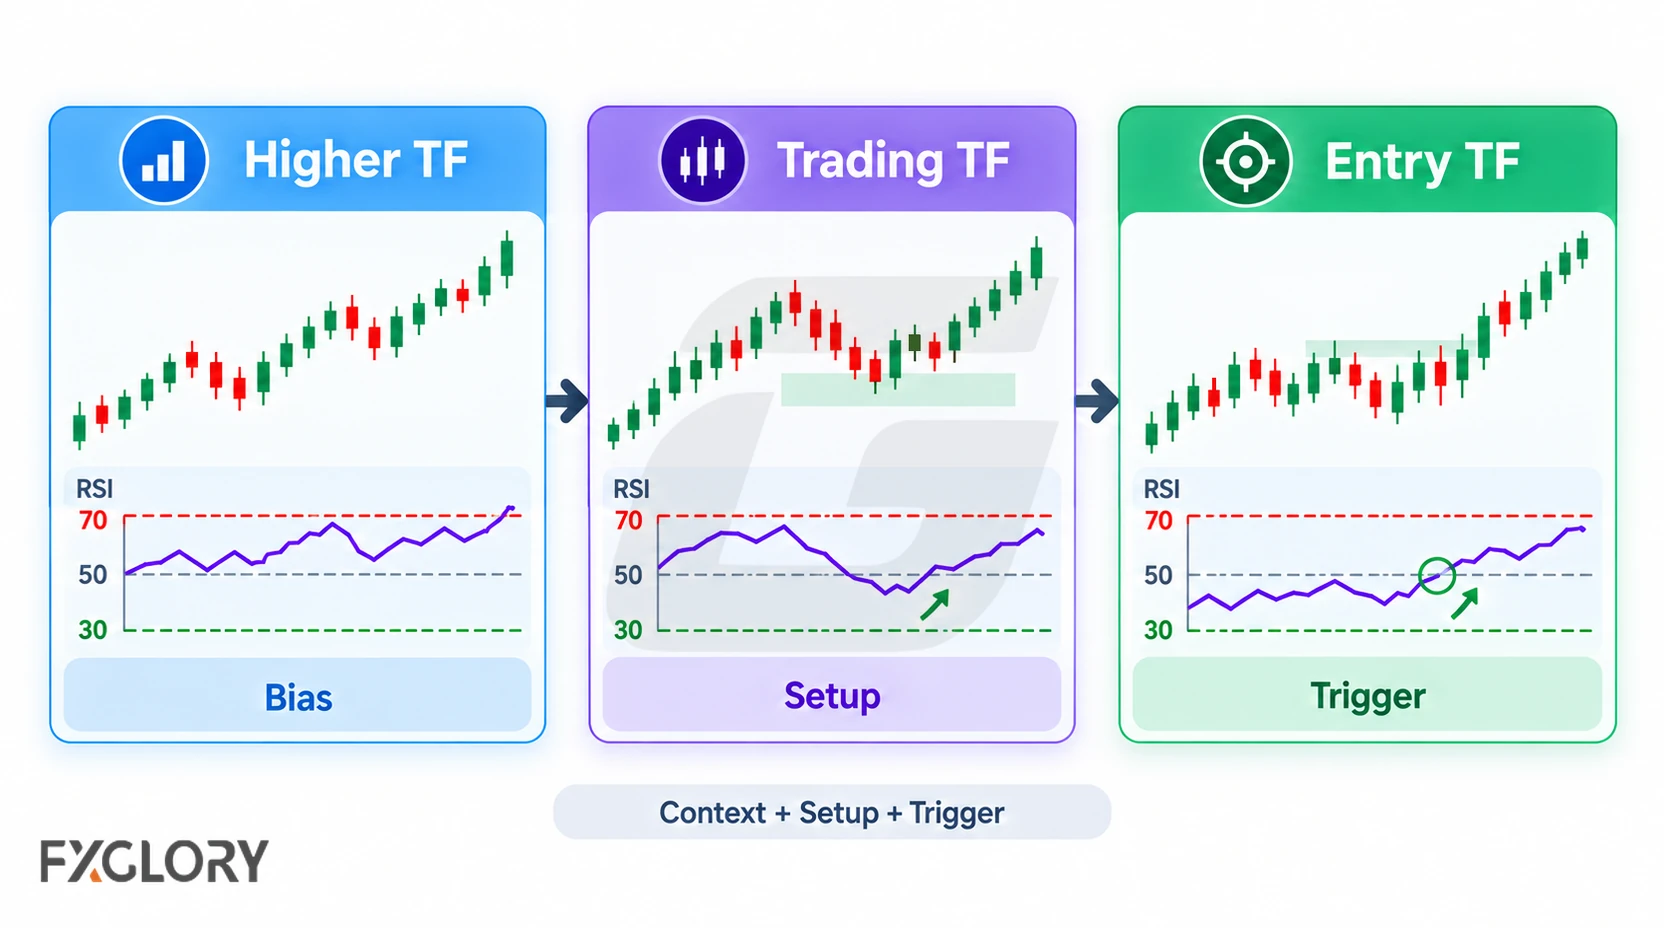
| Timeframe Role | What To Check | Use In The Strategy | Skip If |
|---|---|---|---|
| Higher timeframe | Trend, range, major level, or broader momentum condition | Defines the background context for the RSI idea | The lower-timeframe signal fights the broader structure |
| Trading timeframe | RSI level, divergence, 50-line behaviour, or pullback condition | Defines the setup being reviewed | The RSI reading appears in the middle of unclear price action |
| Entry timeframe | Price trigger, rejection, structure shift, or retest | Helps refine entry and invalidation | The entry timeframe creates noise instead of clearer risk |
Worked Example: RSI Near A Support Level
Illustrative, not backtested: Suppose RSI(14) rises from a completed reading of 27 to 32 as EUR/USD trades near support marked from earlier price lows. This records a rise in RSI through 30, not a confirmed reversal. A hypothetical long plan could separately require a completed close above a previously identified local swing high; the trade would still need a specified invalidation price, stop, costs, and sizing.
| Observation | Possible Meaning | Next Check | Skip If |
|---|---|---|---|
| Price is in a clear range and near support | RSI may support a range-reaction idea | Wait for price confirmation at support | Support breaks and holds lower |
| Price is in a strong downtrend | Low RSI may reflect trend pressure, not reversal | Check whether structure is still bearish | The trade fights the trend without confirmation |
| RSI forms bullish divergence near support | Momentum may be weakening | Wait for price to confirm the shift | Divergence appears but price keeps making lower lows |
| Spread or volatility expands | Risk may become harder to define | Check target, stop distance, and execution conditions | The loss scenario is unclear |
When RSI Forex Strategies Fail
These are possible failure mechanisms, not a ranking of their frequency. A range-reaction rule can conflict with a trend, a divergence can remain unconfirmed, and repeated 50-line crosses can generate alternating signals.
- Automatic 30/70 entries: An extreme threshold alone supplies neither a price-entry condition nor a bounded loss level.
- No price context: RSI is used without support, resistance, trend, or structure.
- Late signal: The RSI confirmation appears after price has already moved away from the risk area.
- Divergence without trigger: Divergence warns of possible momentum change but does not confirm entry by itself.
- Trendline break without price confirmation: An RSI line break may show a momentum shift, but price still needs to confirm the idea.
- Settings changed too often: RSI settings are adjusted after each loss, making the test unreliable.
- Duplicate confirmation: RSI is combined with other momentum indicators that repeat the same message.
- Spread problem: A short-term RSI signal has too little room after trading cost.
- Event risk: News volatility changes the market before the RSI setup can be managed.
When position size, stop distance, and margin need to be checked together, use the FXGlory margin calculator.
Testing An RSI Forex Trading Strategy
Record fixed rules for each setup and apply them to qualifying and rejected events. The test should include ranges, trends, volatile conditions, late signals, and skipped trades without selecting only visually attractive examples.
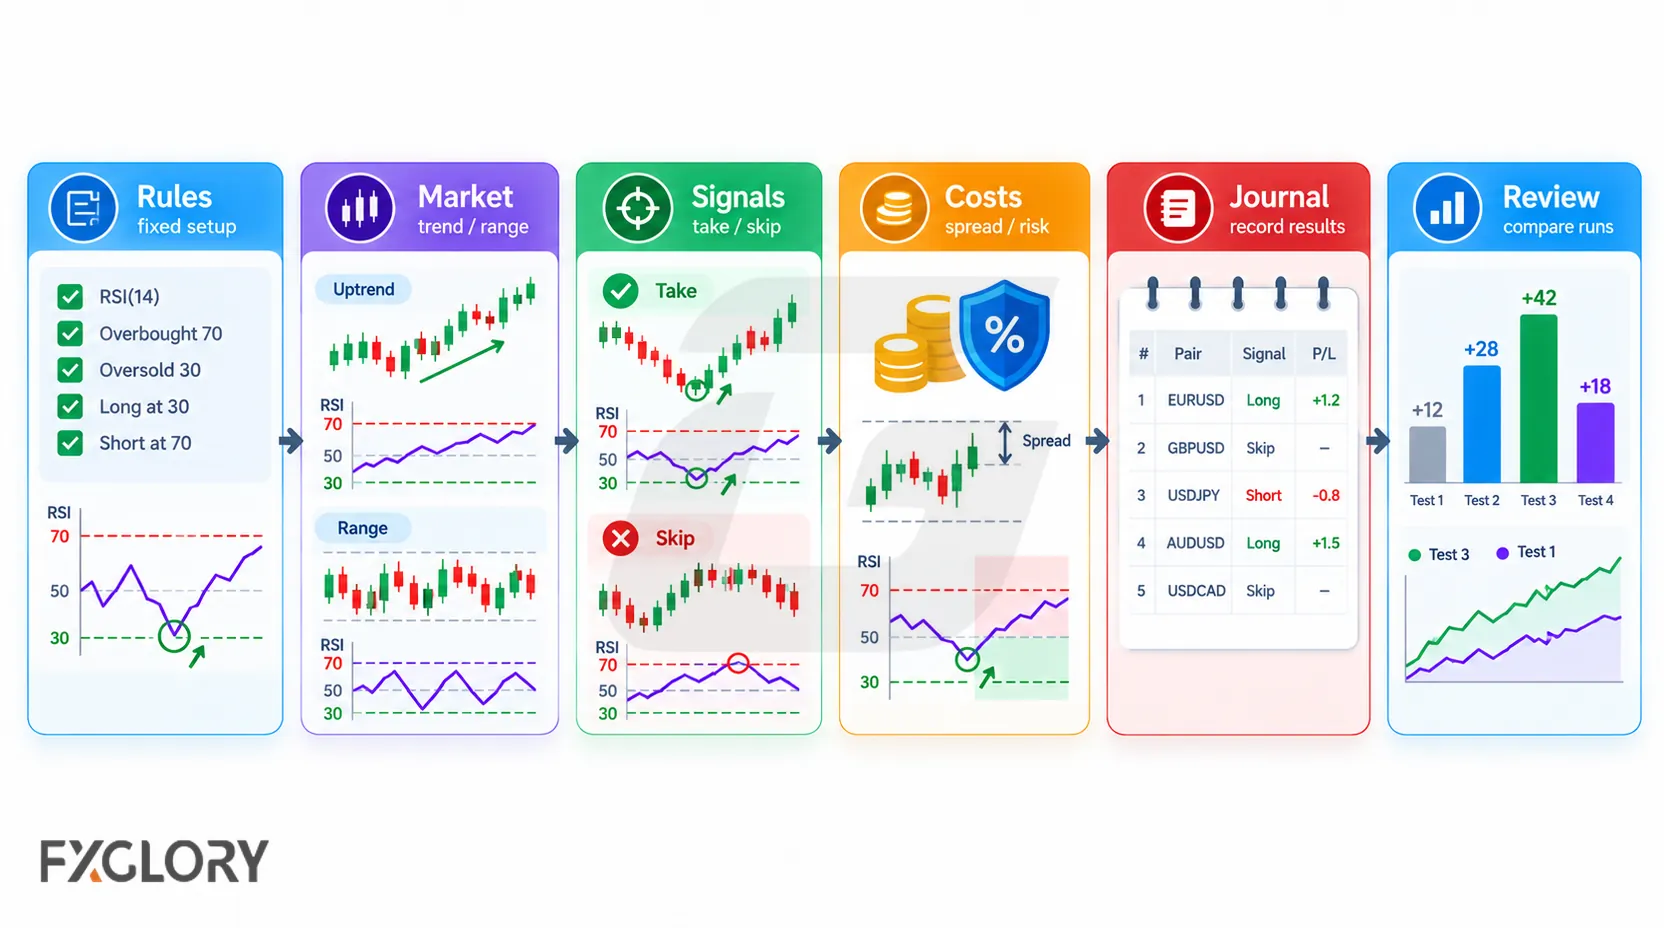
- Which observable market condition qualifies: a predefined range, trend, or other structure?
- Is RSI being used for momentum, divergence, range reaction, pullback review, or confirmation?
- What completed-bar RSI level, cross, matched divergence swings, or RSI trendline test qualifies?
- Which completed-candle price event confirms entry, and does higher-timeframe information use only completed bars available at that moment?
- What is the setup-invalidation price, what is the separate protective-stop rule, and what triggers exit review?
- Do the target and loss assumptions include spread, slippage, and any other transaction costs?
- Does stop distance fit position size and margin exposure?
- Are RSI settings kept consistent during the test?
- Are unconfirmed indicator readings, conflicting-timeframe conditions, late entries, rejected candidates, and explicit no-trade decisions recorded?
- Does the result change across pairs, timeframes, sessions, and a separate out-of-sample period?
Review available currency pairs before applying the same RSI method across too many markets. Review FXGlory trading platforms when the strategy depends on charting tools, RSI settings, alerts, order placement, or trade-management workflow.
RSI Setup-Role Test Notes
This hypothetical educational RSI setup-role test reviewed five RSI setup roles: RSI range reaction, RSI trend pullback, RSI divergence confirmation, RSI 50-line momentum confirmation, and RSI 80/20 extreme reaction. RSI is used as a momentum and confirmation tool, not as a standalone buy or sell signal. The test does not prove that RSI is profitable or that one RSI setup role is universally best.
The model reviewed EURUSD, GBPUSD, USDJPY, AUDUSD, USDCAD, and USDCHF using public yfinance 15-minute OHLC data where available. The 1H candles are resampled from the same 15-minute data so that context and setup timing have defined roles.
| Setup Role | Educational Model Rule |
|---|---|
| RSI range reaction | Reviews RSI recovery near range support or RSI weakness near range resistance when 1H context is range-like |
| RSI trend pullback | Reviews RSI cooling and turning back in the direction of a 1H trend context |
| RSI divergence confirmation | Reviews divergence only after price confirms a structure shift; divergence alone is not treated as an entry |
| RSI 50-line momentum confirmation | Reviews structure breaks when RSI supports momentum above or below the 50-line area |
| RSI 80/20 extreme reaction | Reviews stricter RSI extremes only when price also reacts near a useful range boundary |
| Rule Area | Educational Model Rule |
|---|---|
| RSI | 14-period RSI used as a momentum and confirmation filter |
| Trend reference | EMA(20) and EMA(50) |
| Structure reference | Previous 12 completed 15M candles |
| Divergence reference | Previous 8 completed 15M candles |
| Context chart | 1H trend or range context |
| Setup chart | 15M RSI, EMA, structure, and candle confirmation |
| Session grouping | London morning, London/New York overlap, early New York afternoon, and a separately reported rollover/off-hours group |
| Entry | Next 15M open after the completed setup candle |
| Stop | Setup candle extreme with a 0.25 ATR(14) buffer |
| Target comparison | Fixed 1.3R target from entry |
| Invalidation exit | Setup-specific invalidation based on range boundary, EMA, structure, divergence failure, or setup-candle failure |
| Same-day exit | Forced close at the last available 15M close at or before 20:45 UTC |
| Cost Input | Assumptions Used |
|---|---|
| Spread | 0.5, 1.5, and 3.0 pips |
| Slippage | 0.1, 0.5, and 1.0 pips per side |
| Baseline comparison | 1.5-pip spread and 0.5-pip slippage per side |
| Swap and rollover | Not included because trades are forced flat before the same-day cutoff |
The review records setup candidates, accepted trades, rejected candidates, RSI extreme no-context warnings, rejection reasons, trade count, win rate, average win in R, average loss in R, expectancy in R, profit factor, maximum drawdown in R, worst losing streak, holding time, same-day cutoff exits, setup-role behavior, session-level behavior, pair-level behavior, direction-level behavior, exit reasons, and spread/slippage sensitivity.
Educational RSI Setup-Role Test Results
The baseline run was negative: -0.4014R expectancy and -481.7348R total net result across 1,200 trades. The test used a 1.5-pip spread and 0.5-pip slippage per side. These figures are hypothetical historical results from one educational RSI setup-role model, not proof of future live-trading performance.
| Metric | Baseline Result |
|---|---|
| Setup candidates | 4,008 |
| Trades before overlap filter | 1,662 |
| Accepted trades | 1,200 |
| Rejected candidates | 2,808 |
| RSI extreme no-context warnings | 1,028 |
| Pre-overlap acceptance rate (stored setup acceptance rate) | 41.47% |
| Candidate rejection rate | 70.06% |
| Win rate | 28.33% |
| Average win | 0.8988R |
| Average loss | -0.9155R |
| Expectancy | -0.4014R |
| Profit factor | 0.3882 |
| Maximum drawdown | -483.1189R |
| Worst losing streak | 25 |
| Average holding period | 70.40 minutes |
| Same-day cutoff exit rate | 4.08% |
| Invalidation exit rate | 46.42% |
Acceptance-rate definitions: The stored 41.47% figure equals 1,662 trades before overlap filtering divided by 4,008 candidates. Final accepted trades equal 1,200 out of 4,008 candidates, or 29.94%; the two rates refer to different stages. The original research values are unchanged.
| Rejected Condition | Count |
|---|---|
| outside operating window or Friday cutoff | 2,102 |
| same pair setup role overlap | 462 |
| invalid trade after setup or risk gate | 244 |
Setup-Role Baseline Results
| Setup Role | Trades | Win Rate | Expectancy | Total Net Result | Max Drawdown | Worst Losing Streak |
|---|---|---|---|---|---|---|
| RSI divergence confirmation | 42 | 47.62% | -0.0817R | -3.4319R | -8.7271R | 6 |
| RSI 50-line momentum confirmation | 568 | 27.82% | -0.4114R | -233.6561R | -236.6601R | 30 |
| RSI trend pullback | 572 | 27.45% | -0.4129R | -236.1852R | -237.7477R | 19 |
| RSI range reaction | 17 | 29.41% | -0.4191R | -7.1242R | -5.7185R | 4 |
| RSI 80/20 extreme reaction | 1 | 0.00% | -1.3373R | -1.3373R | 0.0000R | 1 |
Small-sample caution: The 80/20 role contains only one accepted trade. Its numerical result describes that one observation and cannot support a reliable ranking of strategy roles.
Session-Level Baseline Results
| Session | Trades | Win Rate | Expectancy | Total Net Result | Invalidation Exit Rate |
|---|---|---|---|---|---|
| London/New York overlap | 479 | 30.48% | -0.3656R | -175.1385R | 43.22% |
| London morning | 496 | 28.83% | -0.4162R | -206.4173R | 47.58% |
| Early New York afternoon | 199 | 23.62% | -0.4209R | -83.7571R | 52.26% |
| Rollover/off-hours | 26 | 15.38% | -0.6316R | -16.4219R | 38.46% |
Pair-Level Baseline Results
| Pair | Trades | Win Rate | Expectancy | Total Net Result | Max Drawdown |
|---|---|---|---|---|---|
| USDCAD | 240 | 25.42% | -0.3063R | -73.5139R | -73.6903R |
| EURUSD | 169 | 33.14% | -0.3715R | -62.7777R | -65.8157R |
| USDCHF | 211 | 30.81% | -0.3820R | -80.6115R | -81.5708R |
| GBPUSD | 206 | 25.73% | -0.4433R | -91.3152R | -92.3462R |
| USDJPY | 214 | 26.17% | -0.4546R | -97.2893R | -98.2841R |
| AUDUSD | 160 | 30.63% | -0.4764R | -76.2272R | -77.2160R |
Selected Cost Sensitivity
| Cost Case | Trades | Weighted Win Rate | Weighted Expectancy | Total Net Result |
|---|---|---|---|---|
| 0.5 pip spread / 0.1 pip slippage per side | 1,200 | 29.33% | -0.1768R | -212.1103R |
| 1.5 pip spread / 0.5 pip slippage per side | 1,200 | 28.34% | -0.4014R | -481.7347R |
| 3.0 pip spread / 1.0 pip slippage per side | 1,200 | 27.17% | -0.7135R | -856.2132R |
Reporting precision: The overall baseline table lists 28.33% win rate and -481.7348R net, while the baseline cost-sensitivity row lists 28.34% weighted win rate and -481.7347R net. These figures are retained as recorded; the source trade log or calculation script would be needed to establish whether their differences arise from rounding or aggregation.
Exit Reason Counts
| Exit Reason | Count |
|---|---|
| target 1.3R | 307 |
| rsi trend pullback invalidation exit | 290 |
| stop loss | 265 |
| rsi 50 line momentum invalidation exit | 261 |
| same day cutoff exit | 49 |
| time exit | 20 |
| rsi range reaction invalidation exit | 4 |
| rsi divergence confirmation invalidation exit | 2 |
| stop first same bar | 2 |
What This RSI Setup-Role Test Shows
All five setup roles were negative under the baseline assumptions in this sample. The overall result was -0.4014R expectancy and -481.7348R total net result, with 1,200 accepted trades after the setup, session, risk, and overlap filters.
RSI divergence confirmation had the least-negative reported baseline expectancy at -0.0817R across 42 trades, but this alone cannot establish that the role is superior. RSI 80/20 extreme reaction had a reported -1.3373R expectancy from just one accepted trade; this single observation is unsuitable for meaningful comparison with the larger groups.
The educational use of the test is to review cost sensitivity, rejection reasons, session timing, RSI extreme warnings, invalidation exits, and whether RSI is being used as a momentum or confirmation filter instead of an automatic trade command.
For reproducibility, retain the exported trade log and script identified in the research metadata. The structured record specifies a requested 60-day lookback but does not list the precise first and last timestamps of usable bars for each pair; obtain those from the source files rather than inventing dates. Also verify that resampled 1H context was available at the relevant 15M decision times. Neither point is resolved by the published aggregates alone.